Speare 4.0 Interface Introduction
contact us at: support@speare.com
To navigate this document with great efficiency, click the navigation outline icon in the top left corner of this document.
What makes Speare different?
Your ideas become a natural framework for writing...
board view

document view
Writing with both sides of your brain in sync
The Speare interface was designed to make it possible to jump between linear and nonlinear writing modes quickly and easily. The right side of the brain to the left side of the brain and back and forth throughout the writing process.
We built the Speare interface by asking ourselves, what if you could create an interface ergonomically designed for the mind, that would be able to stimulate the right side of the brain with one interface and quickly jump to another interface to stimulate the left side of the brain—the expressive side with the analytical side.
We believe that it is possible to do so. We believe it's possible to have the whole brain working together so that we can optimize our creativity. This is why we've come up with an interface that turns your ideas (right side) into final drafts (left side) faster by stimulating your mind to make the transitions necessary to build ideas into something concrete and meaningful. That is the theory.
This document is created using Speare and we hope that it will help you easily find the answers to the questions you have and get you up and running quickly.
the building blocks of the Speare interface
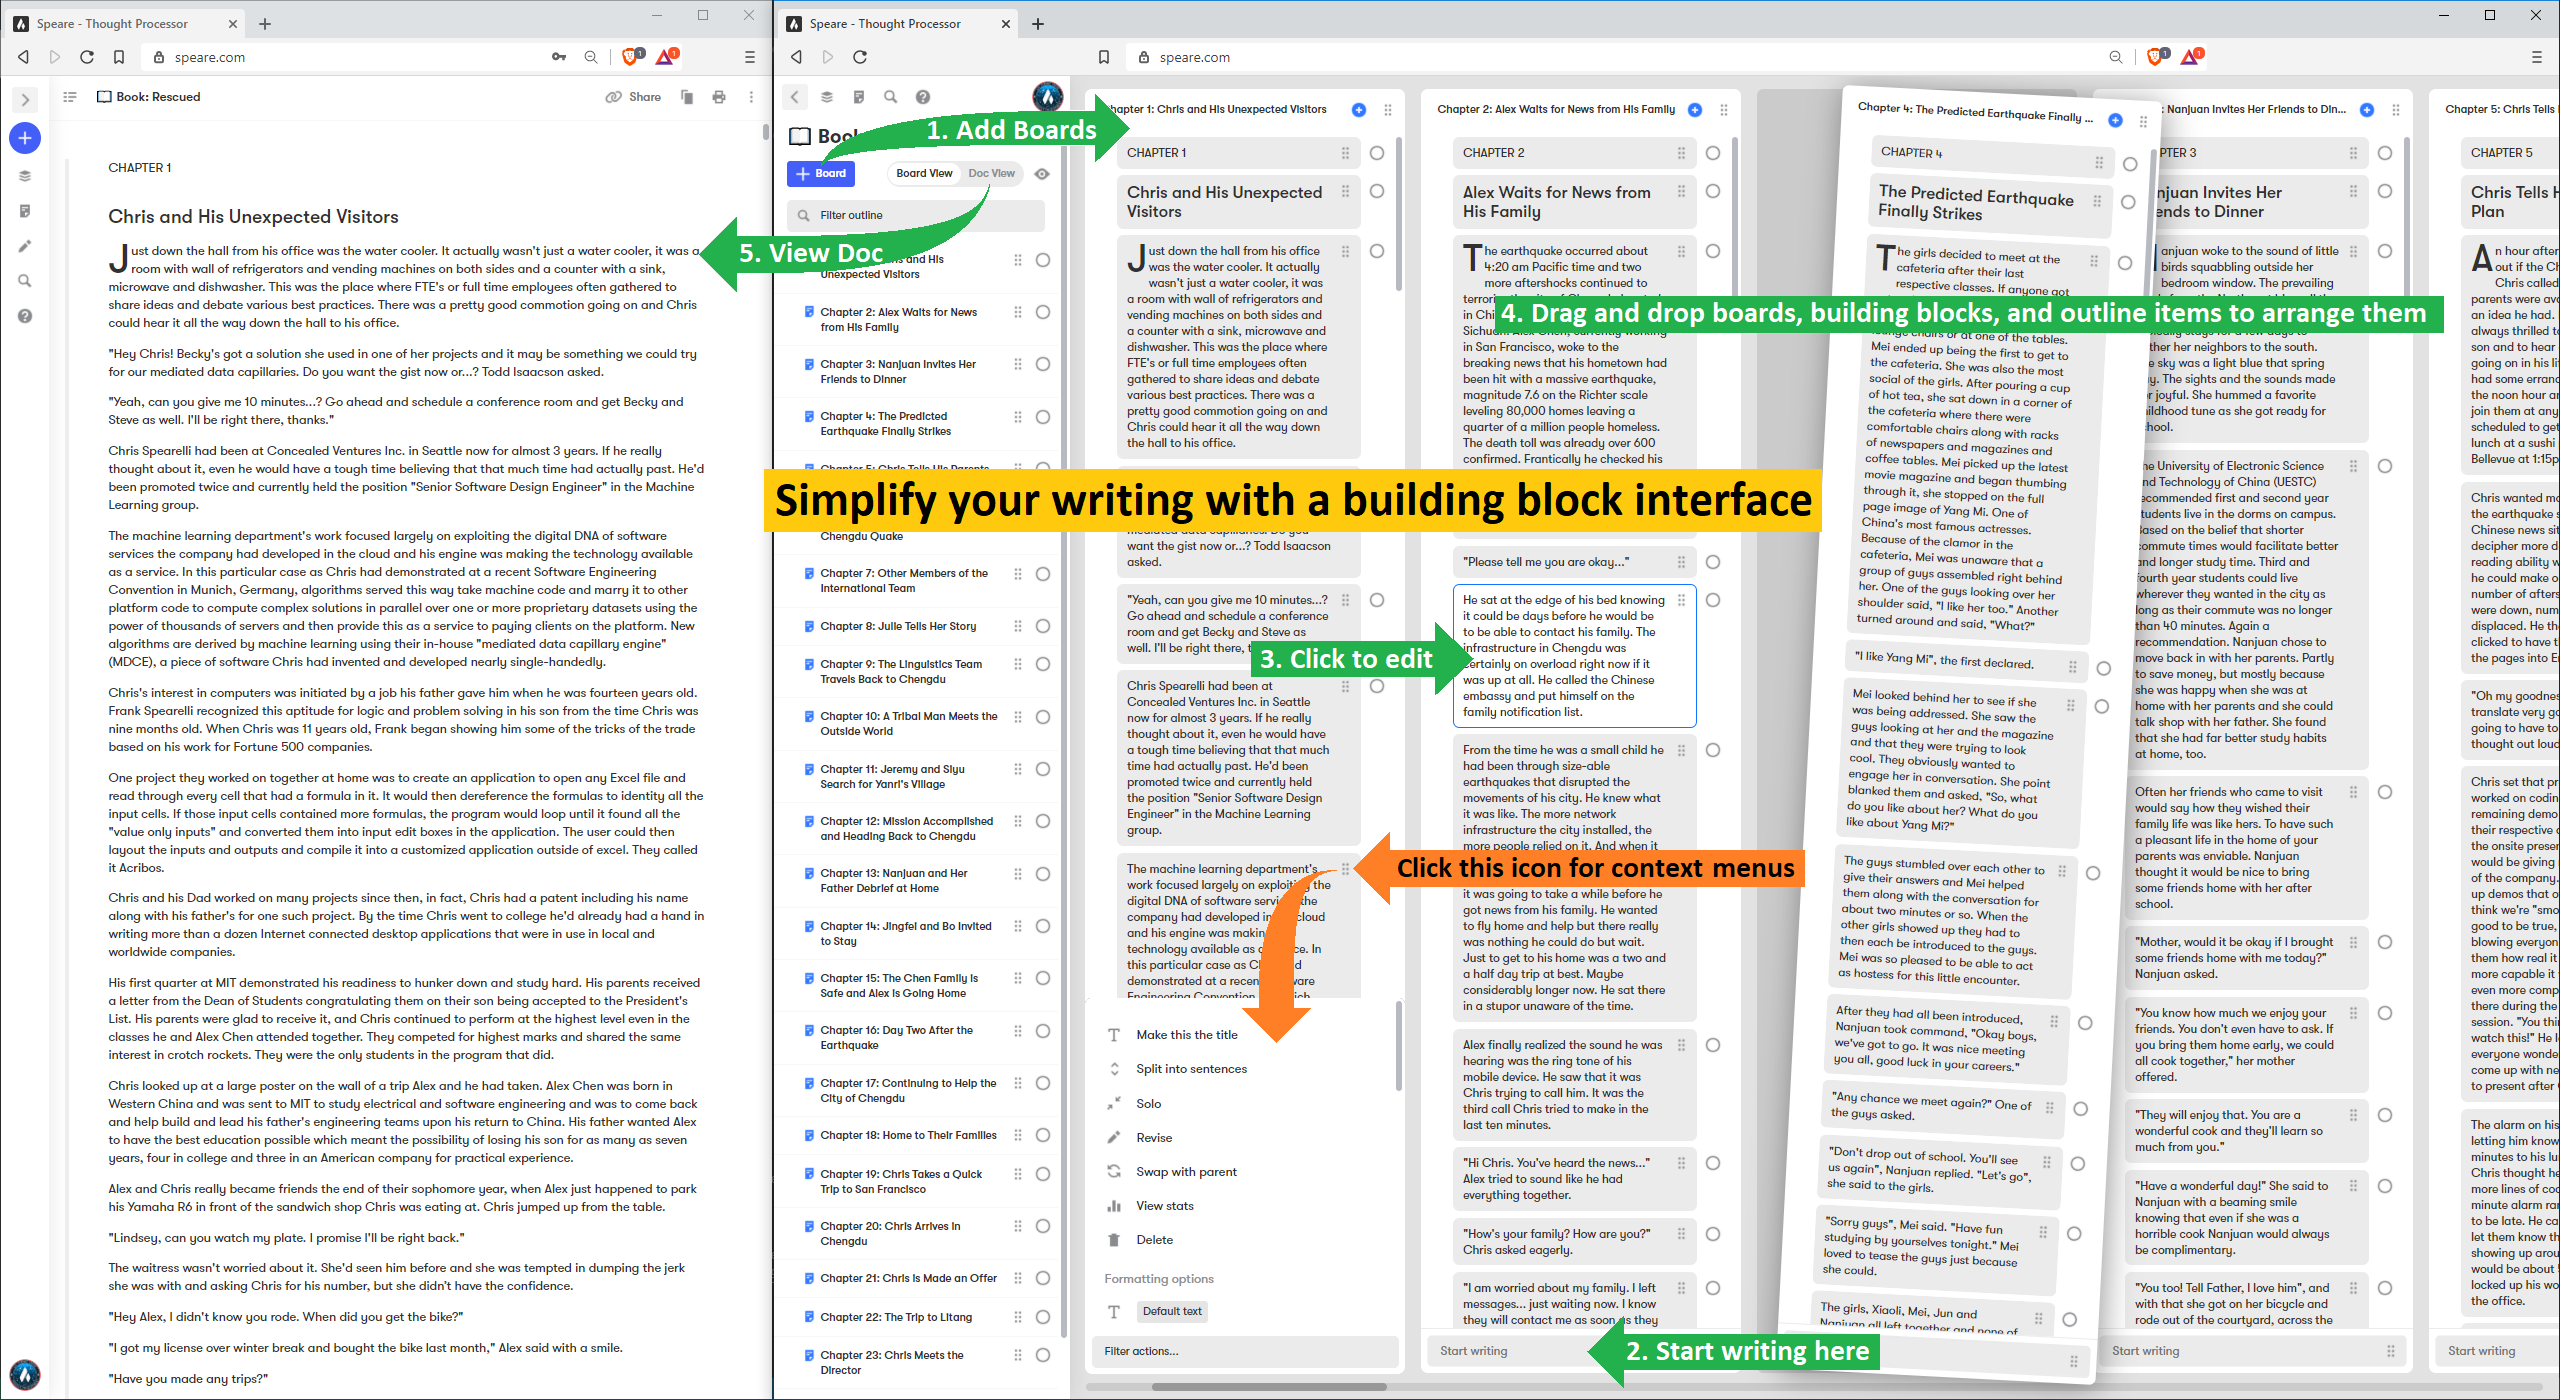
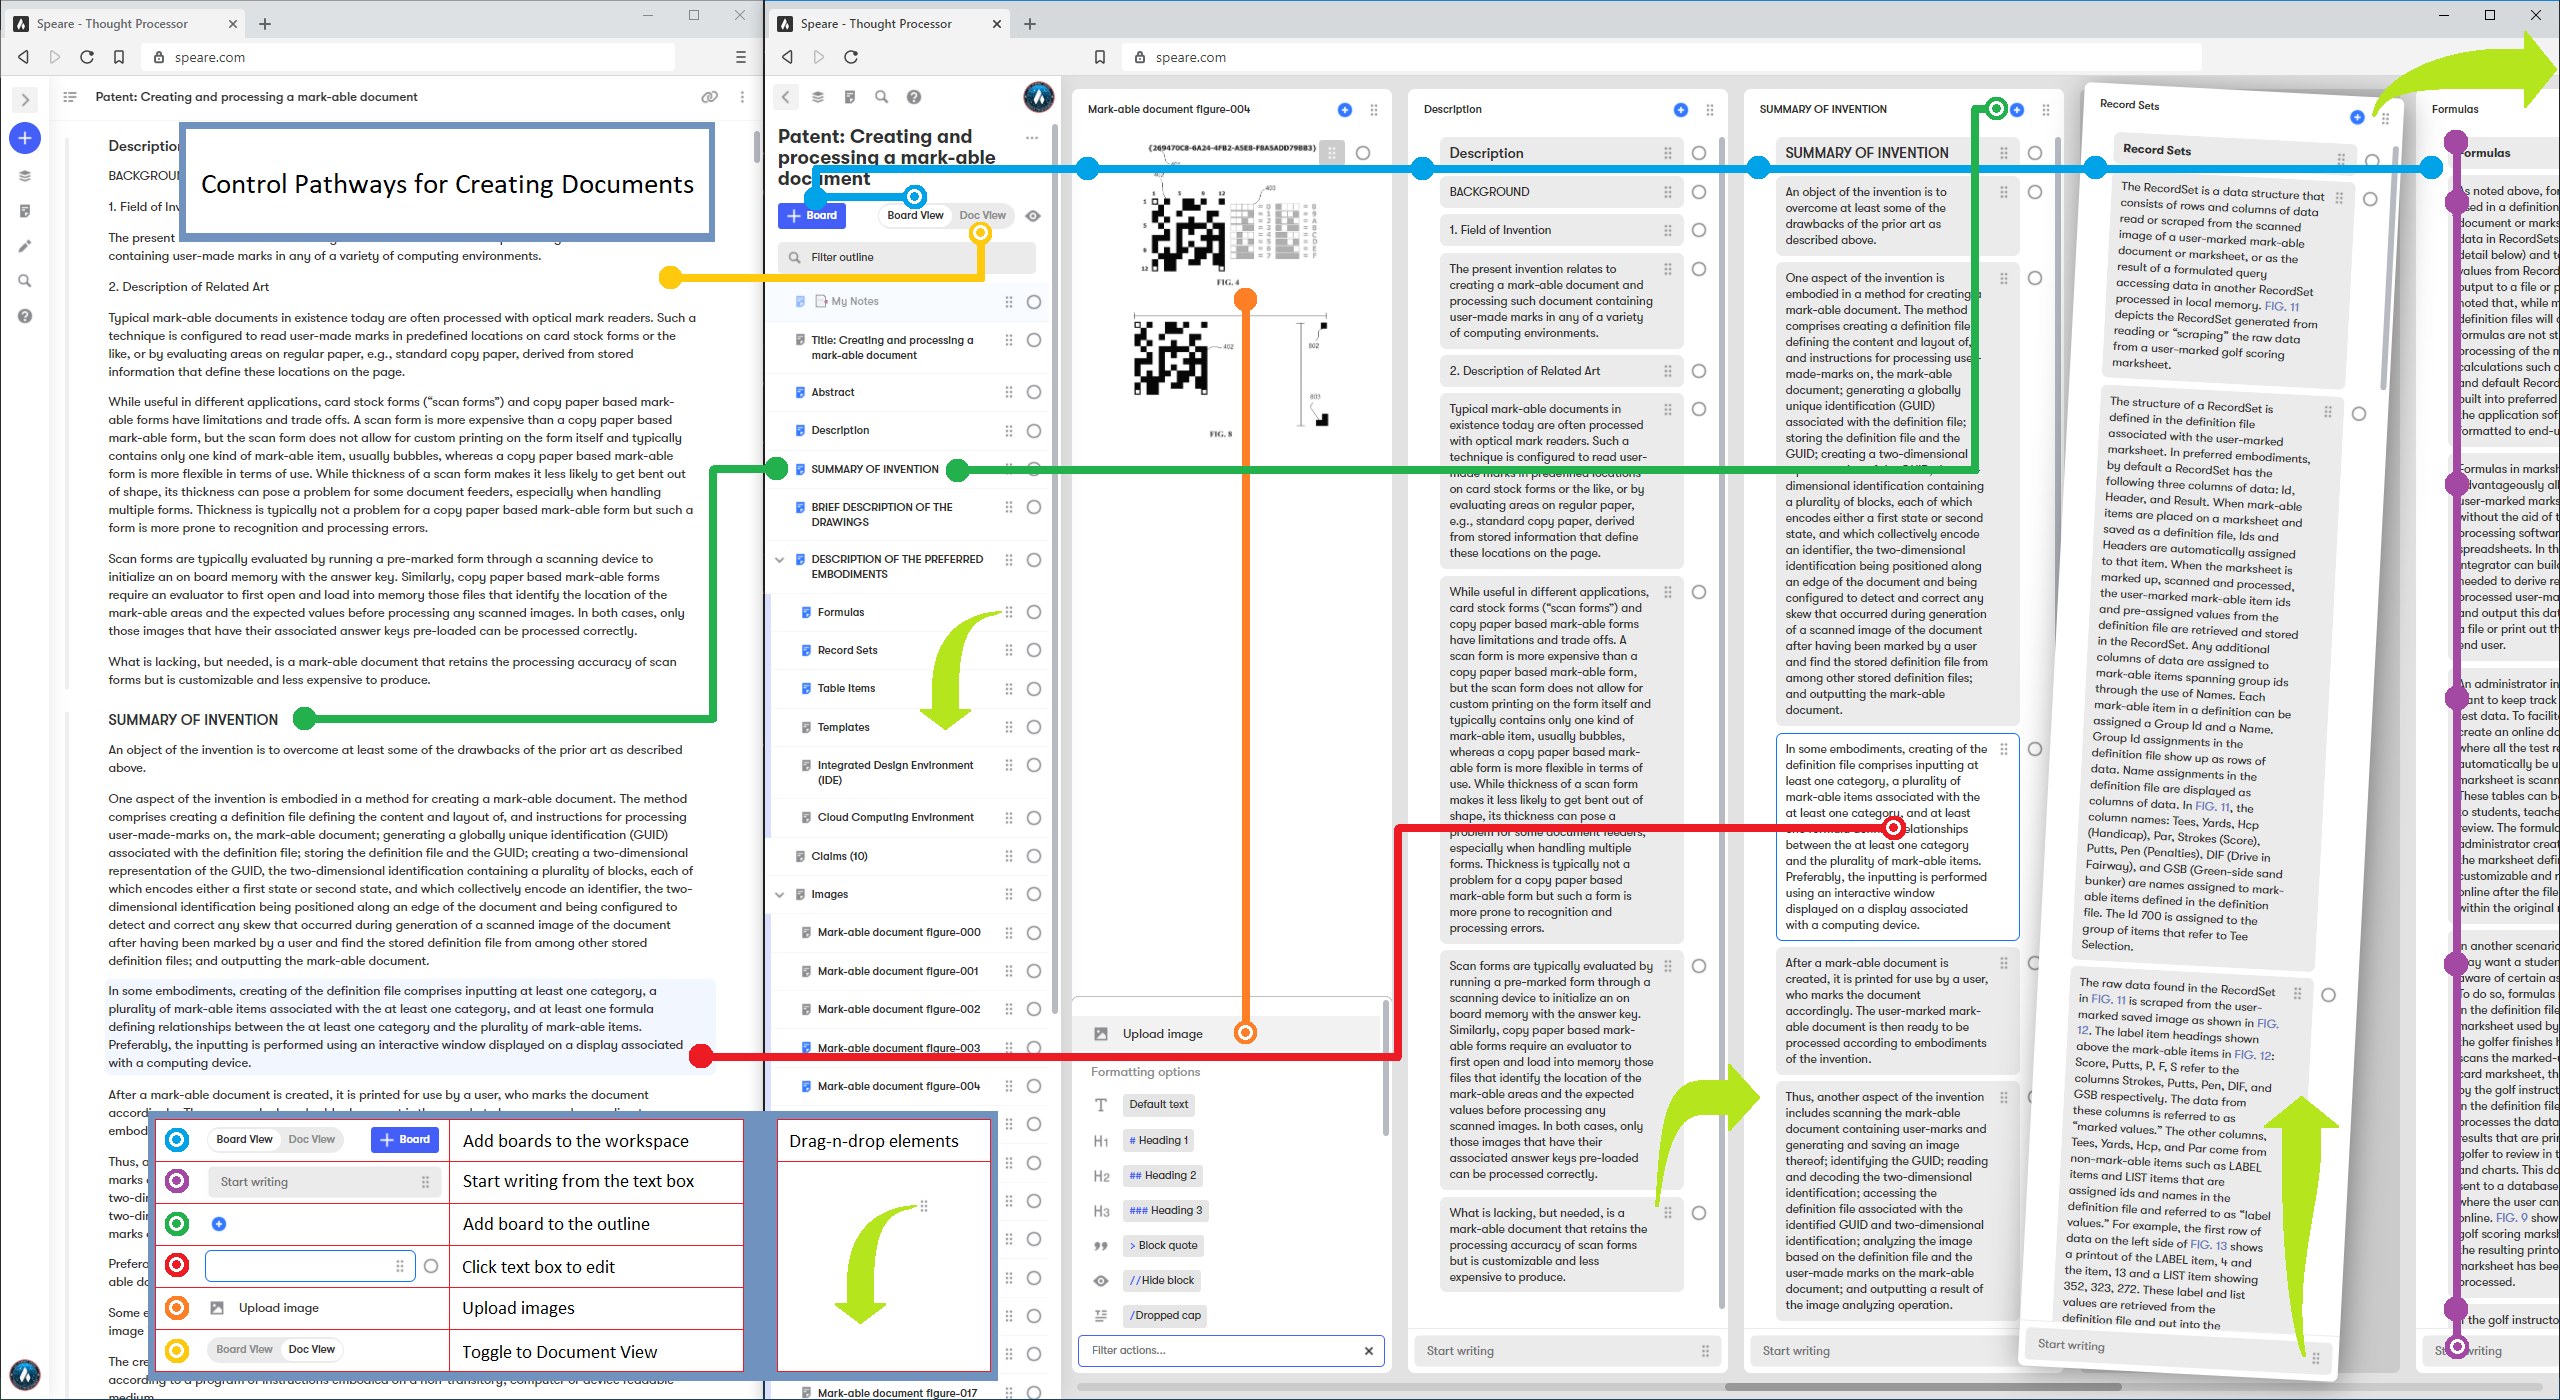
the controls for creating and working with documents
Feature menus
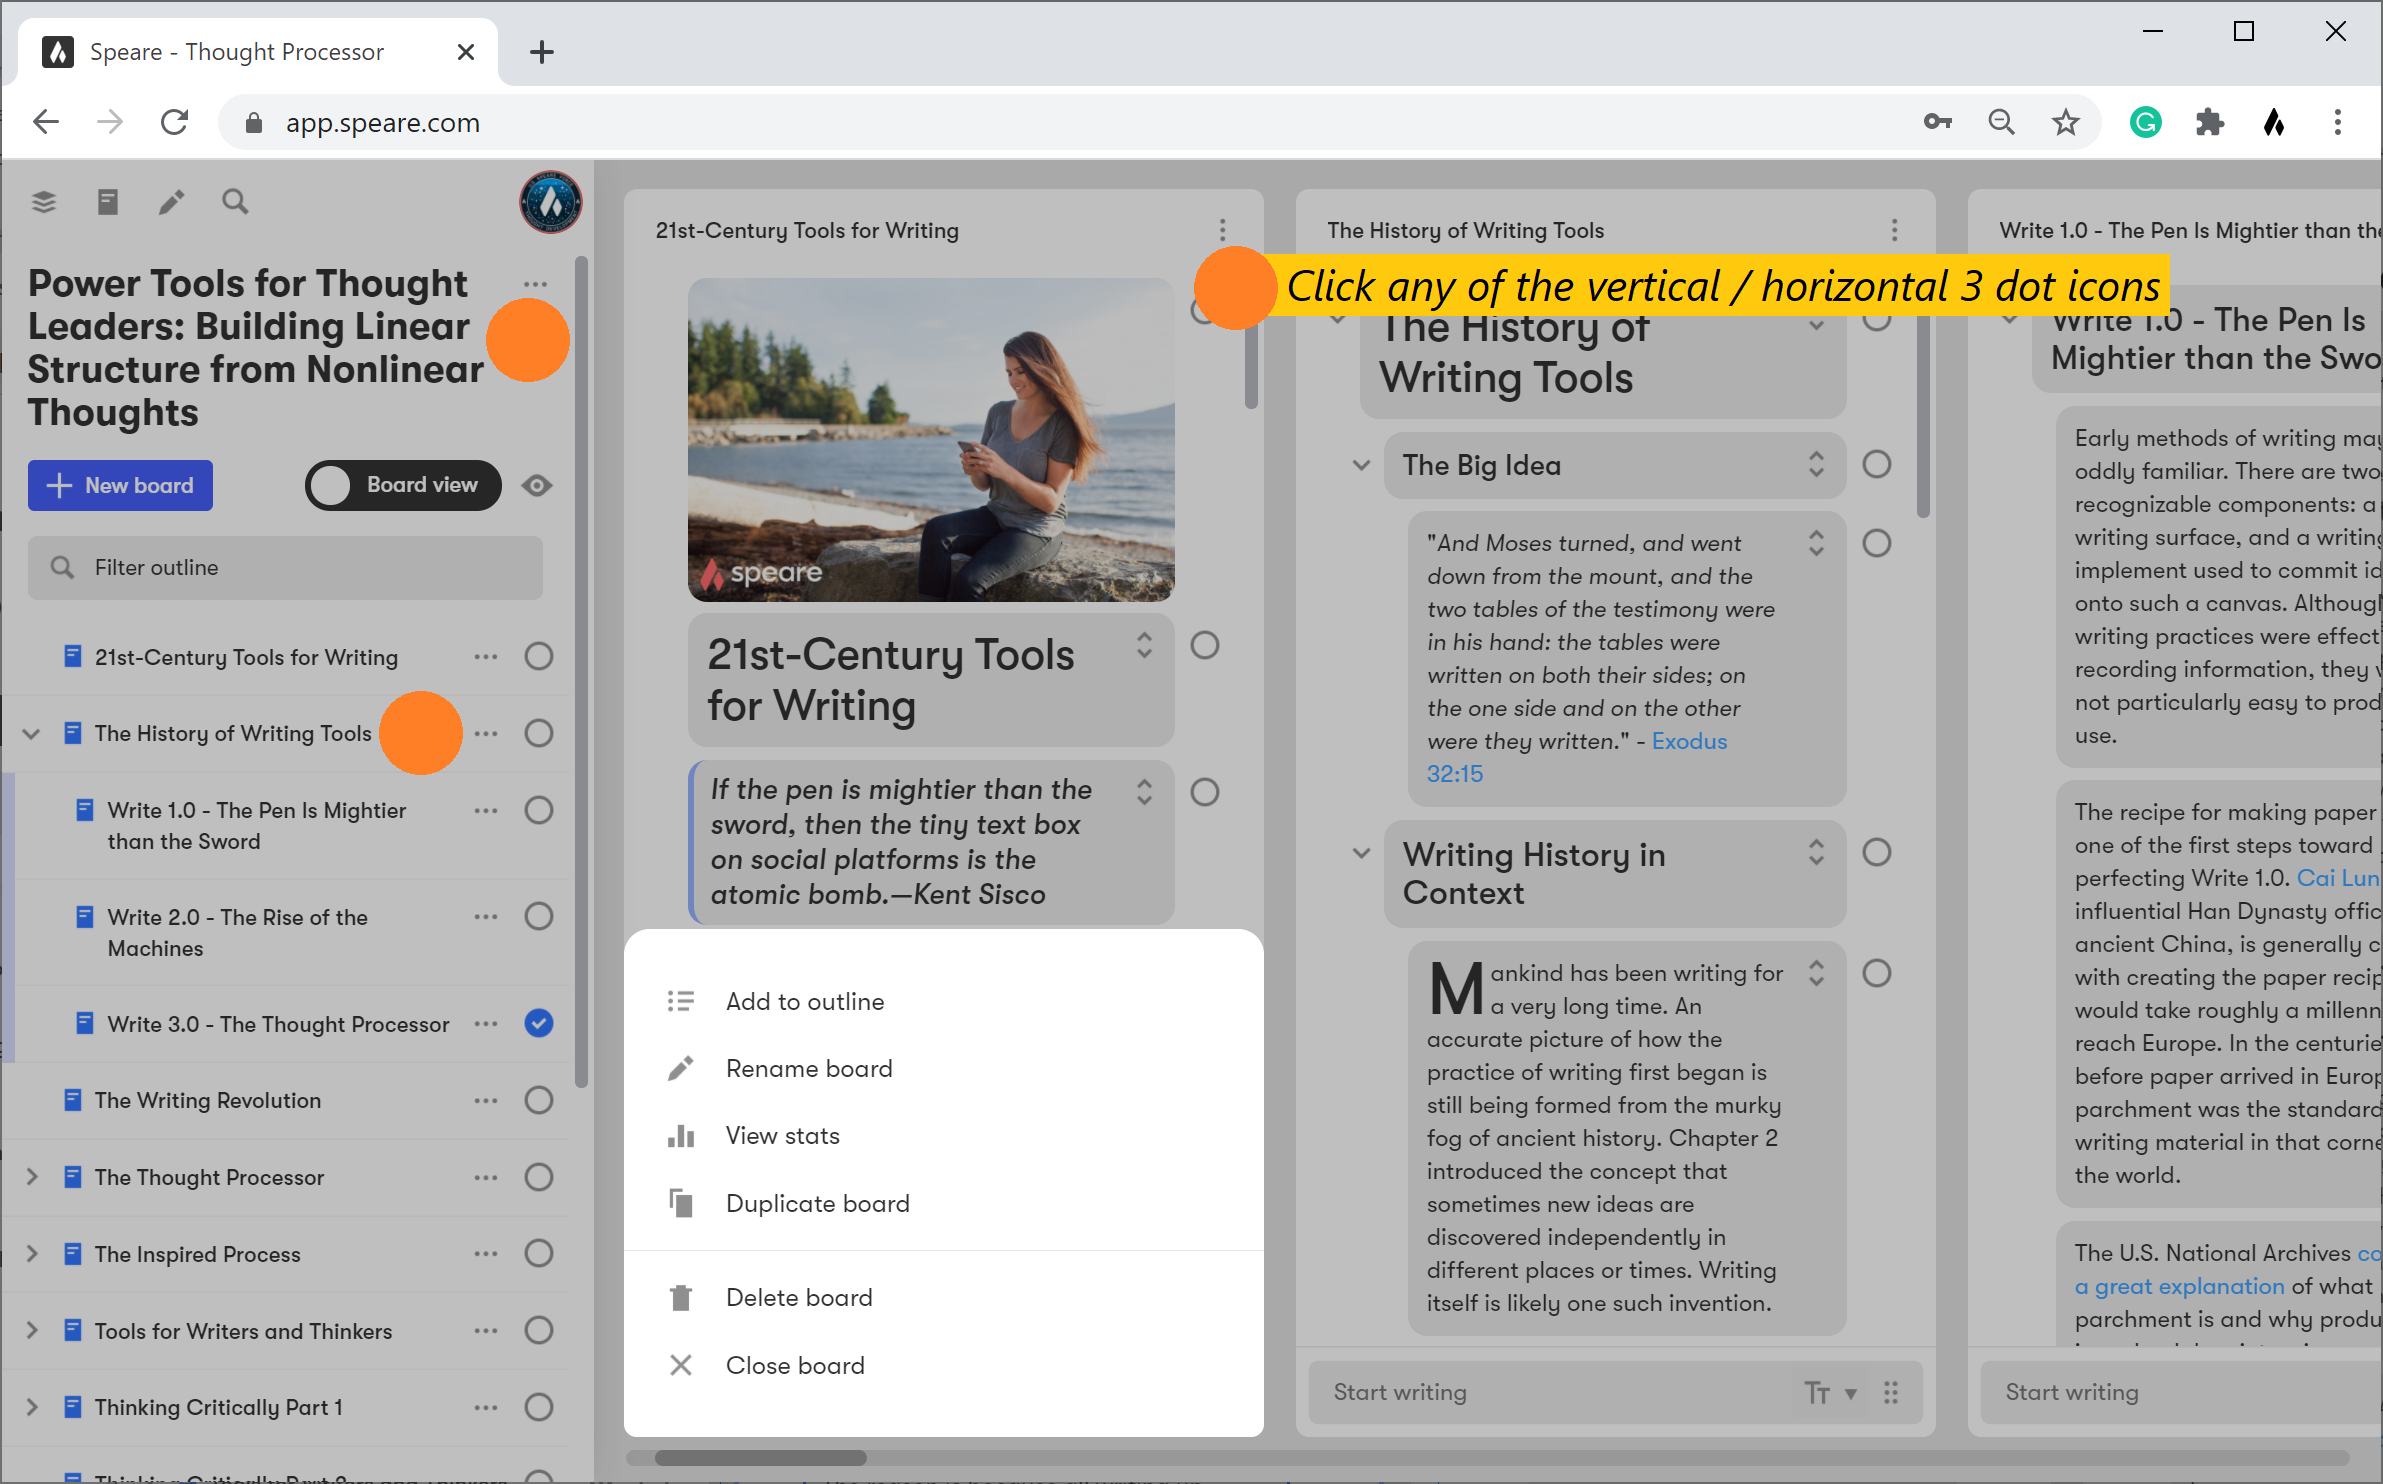
So where are the menus in Speare 4.0? Well, each feature in Speare has its own built-in menu. These menus are accessible by clicking either the vertical or horizontal 3 dot icons on the feature indicated by the orange dots.
There is also a set of icons in the top left corner of the left panel.

From left to right they are...
Context menus
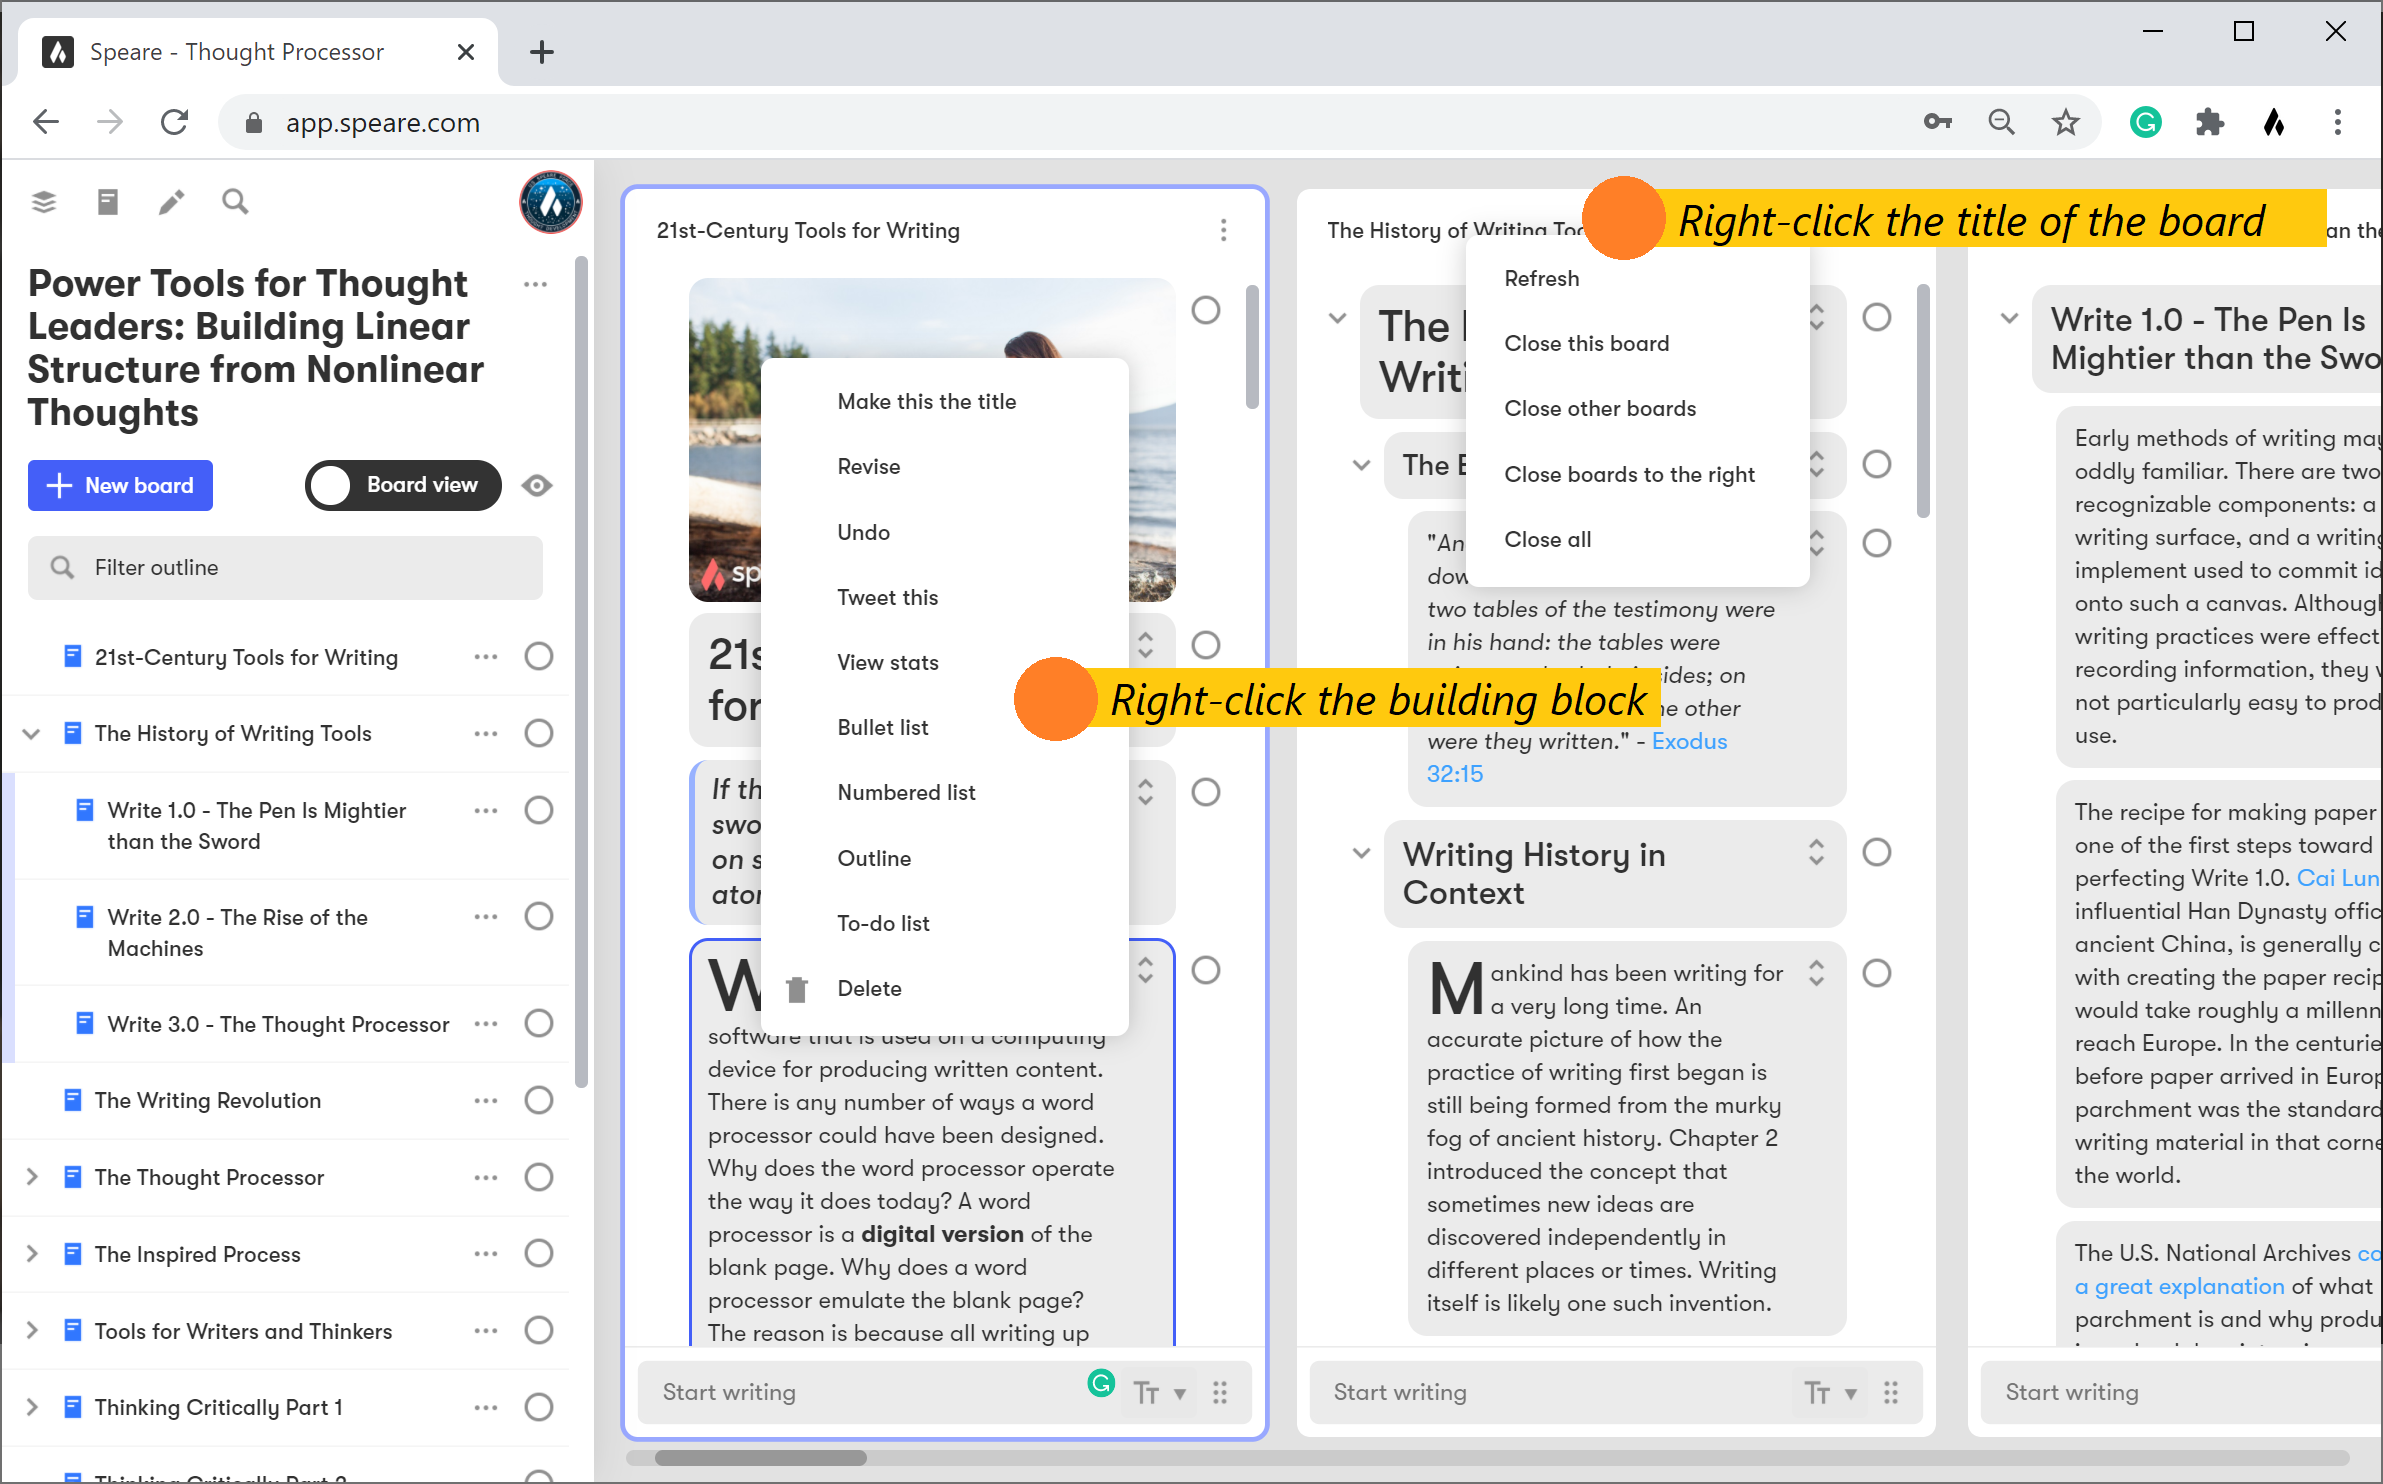
There are two main context menus one for boards and one for building blocks. To have access the board context menu, right click the title of the board. To access the building block context menu right click the building block.
//Working with Boards
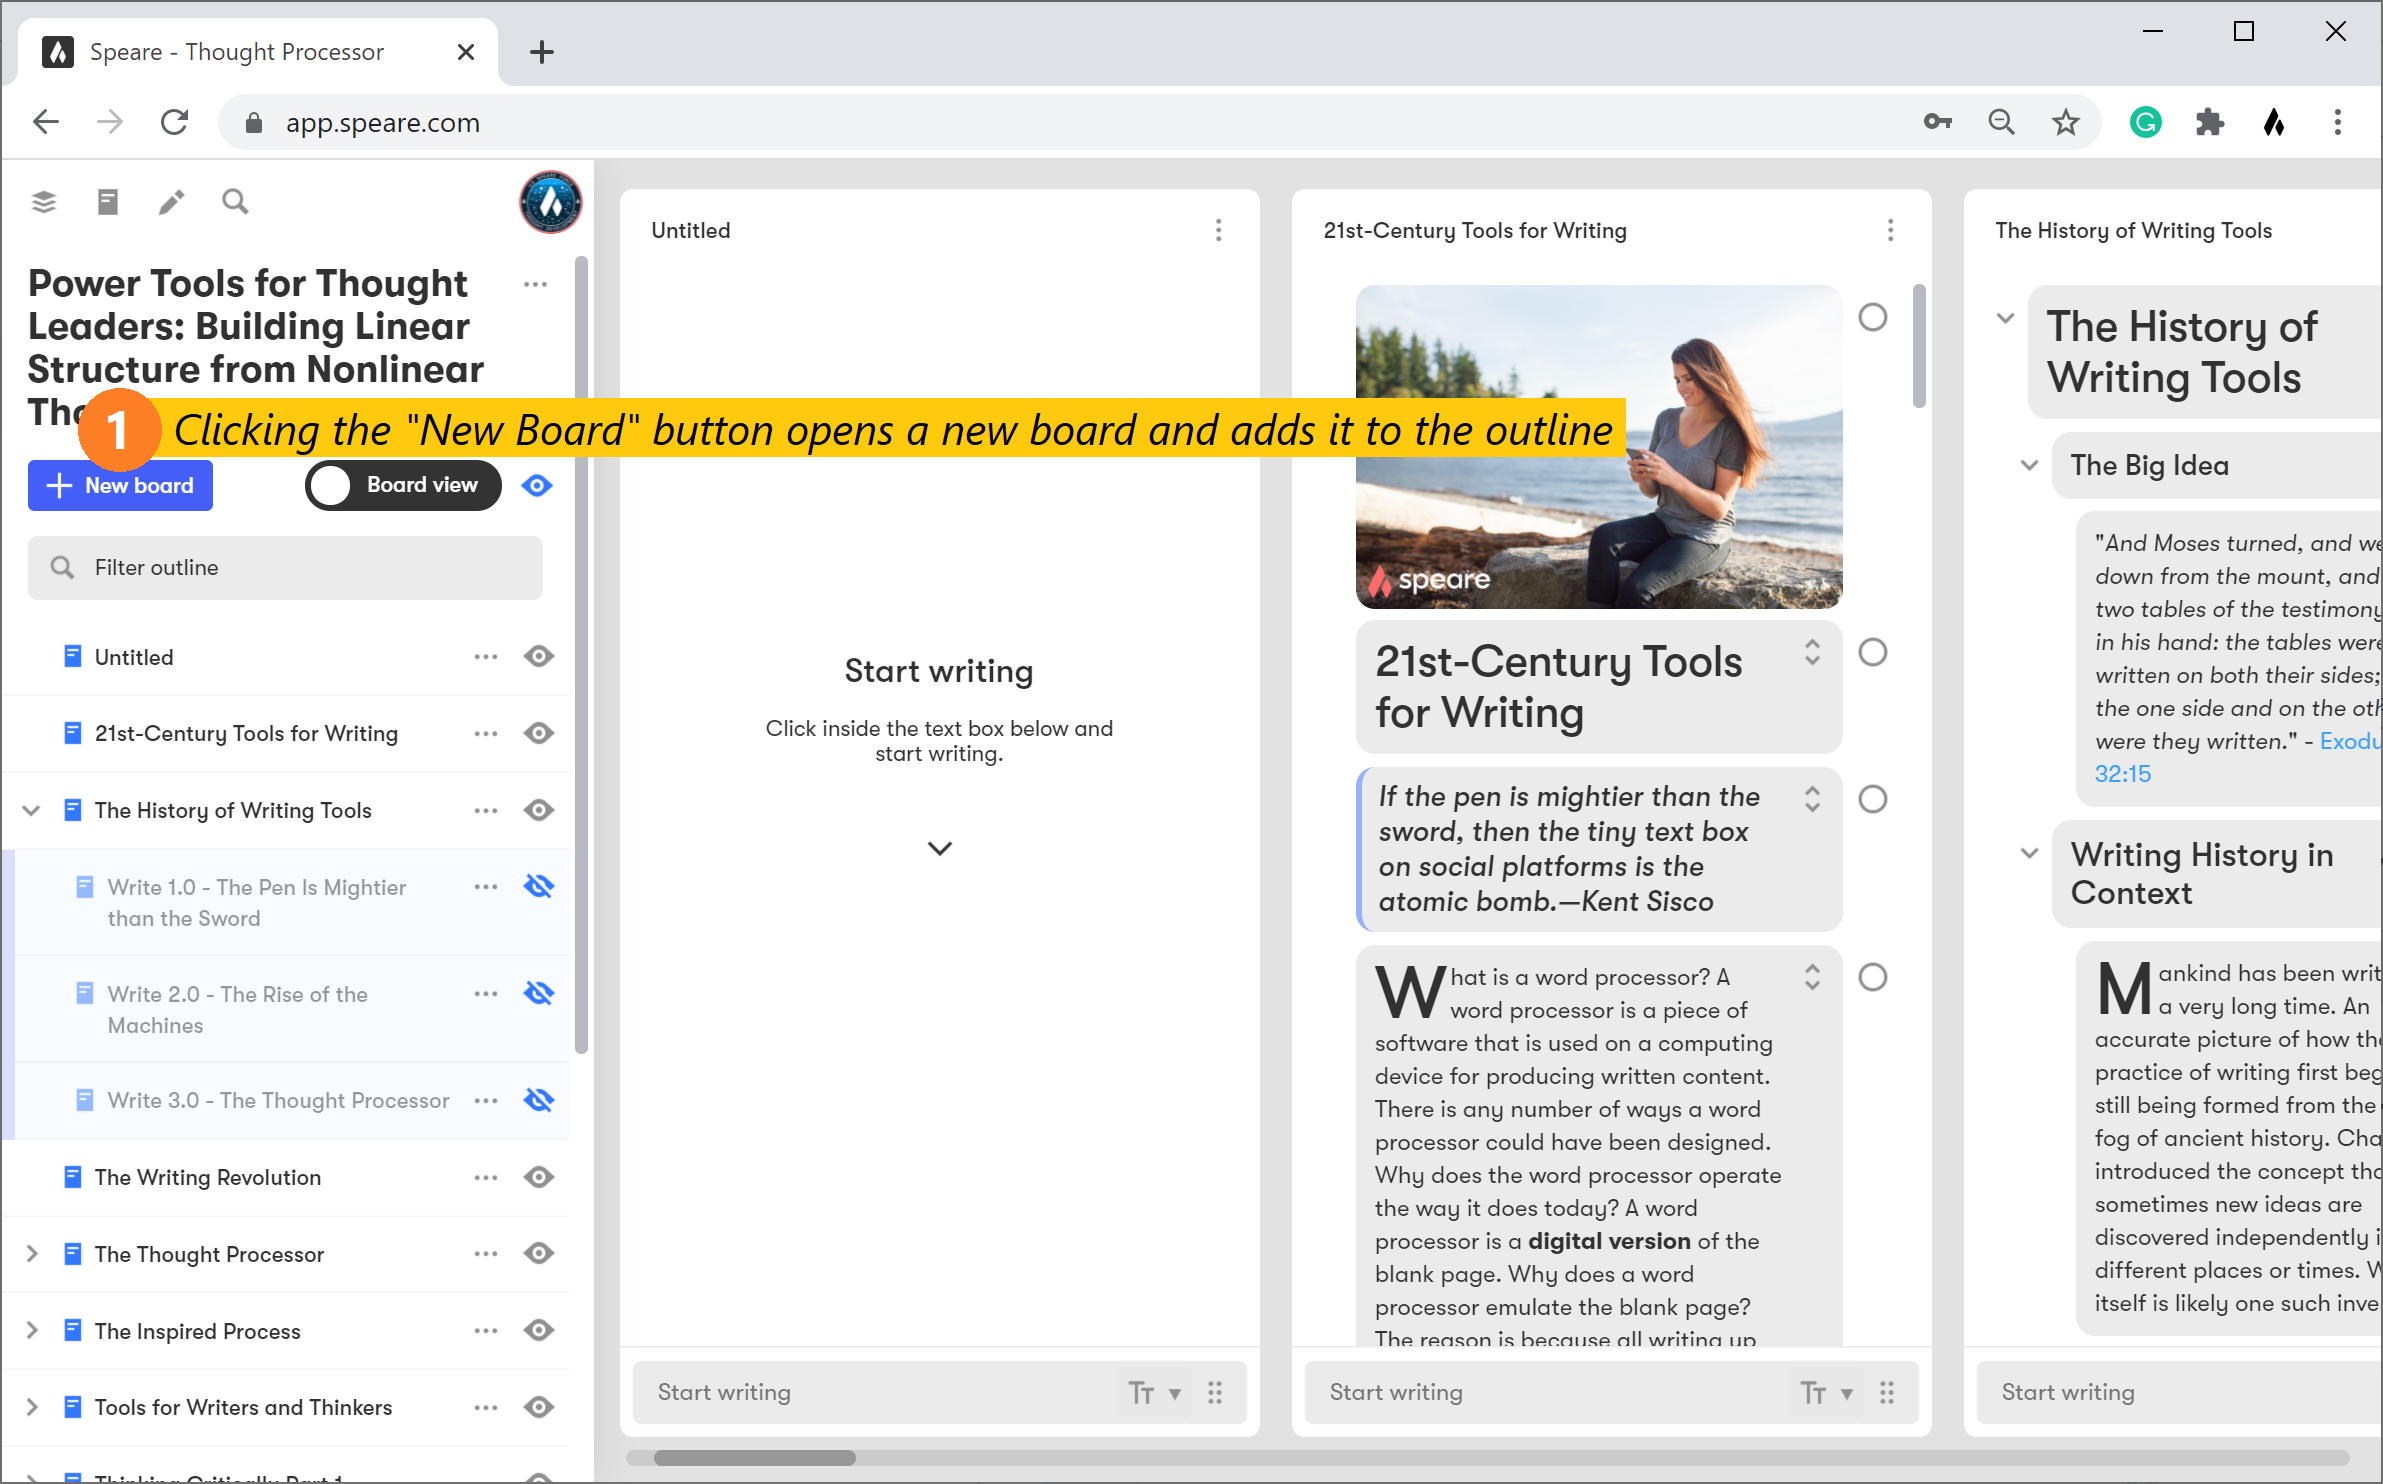
Opening a new board
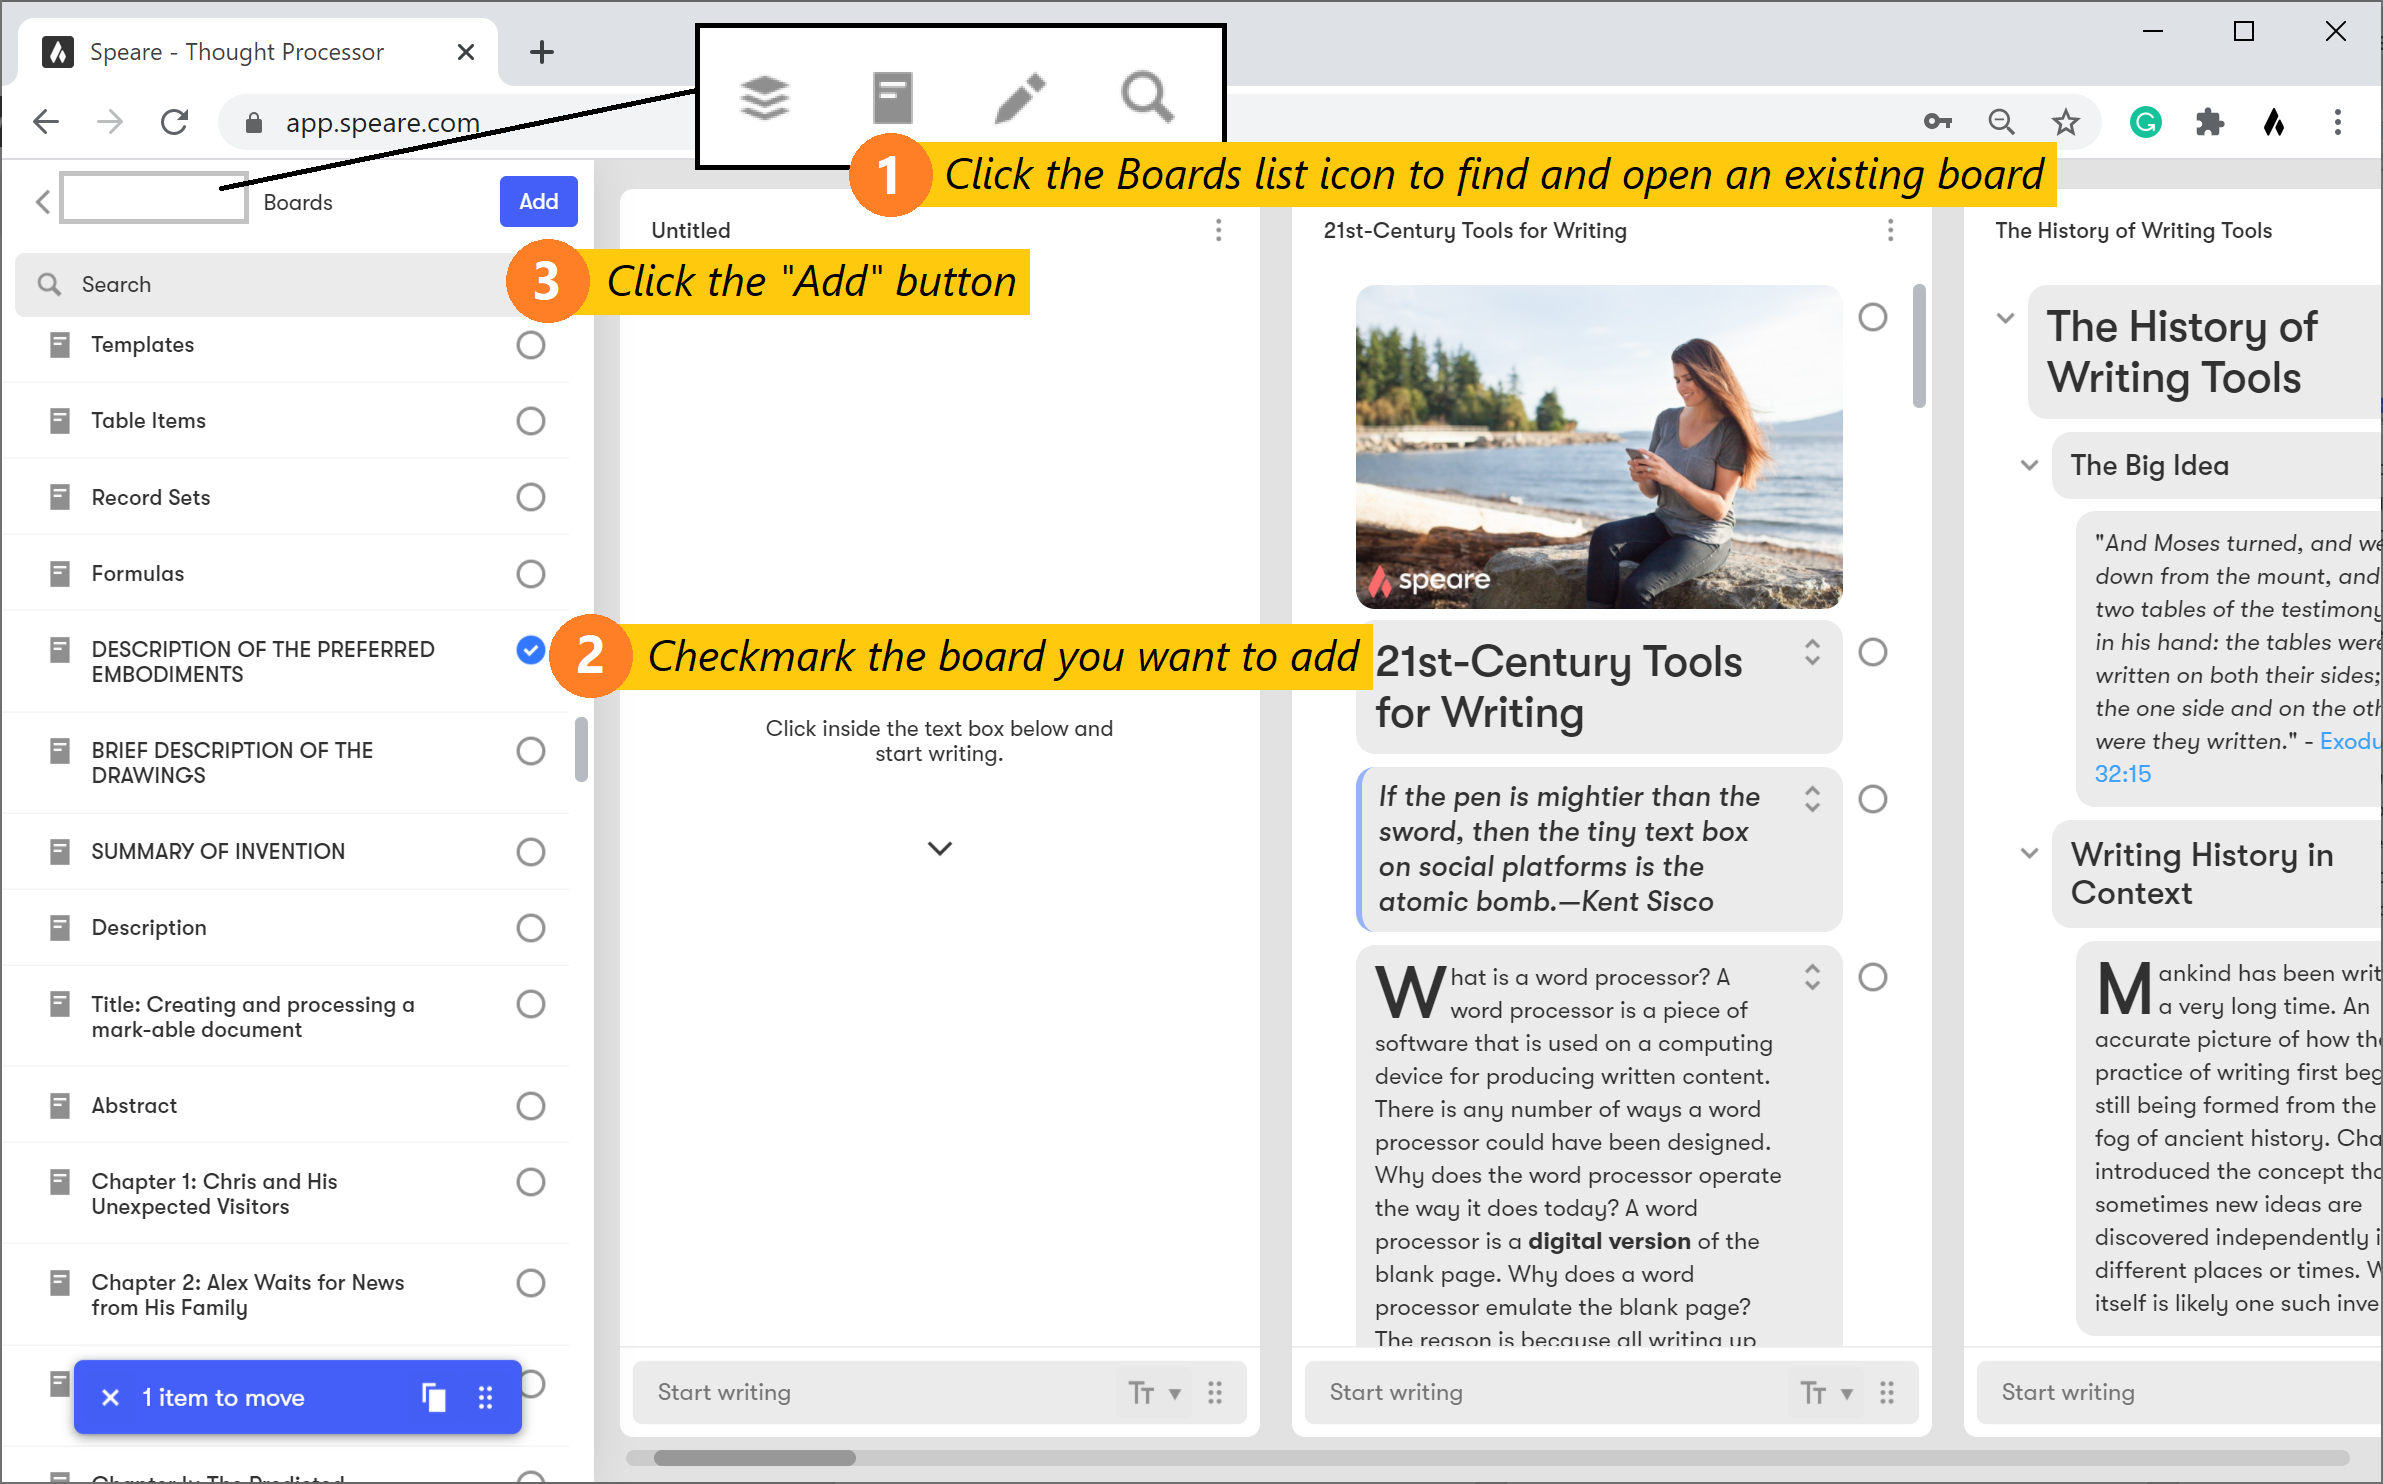
Opening an existing board
Moving boards in Boards view
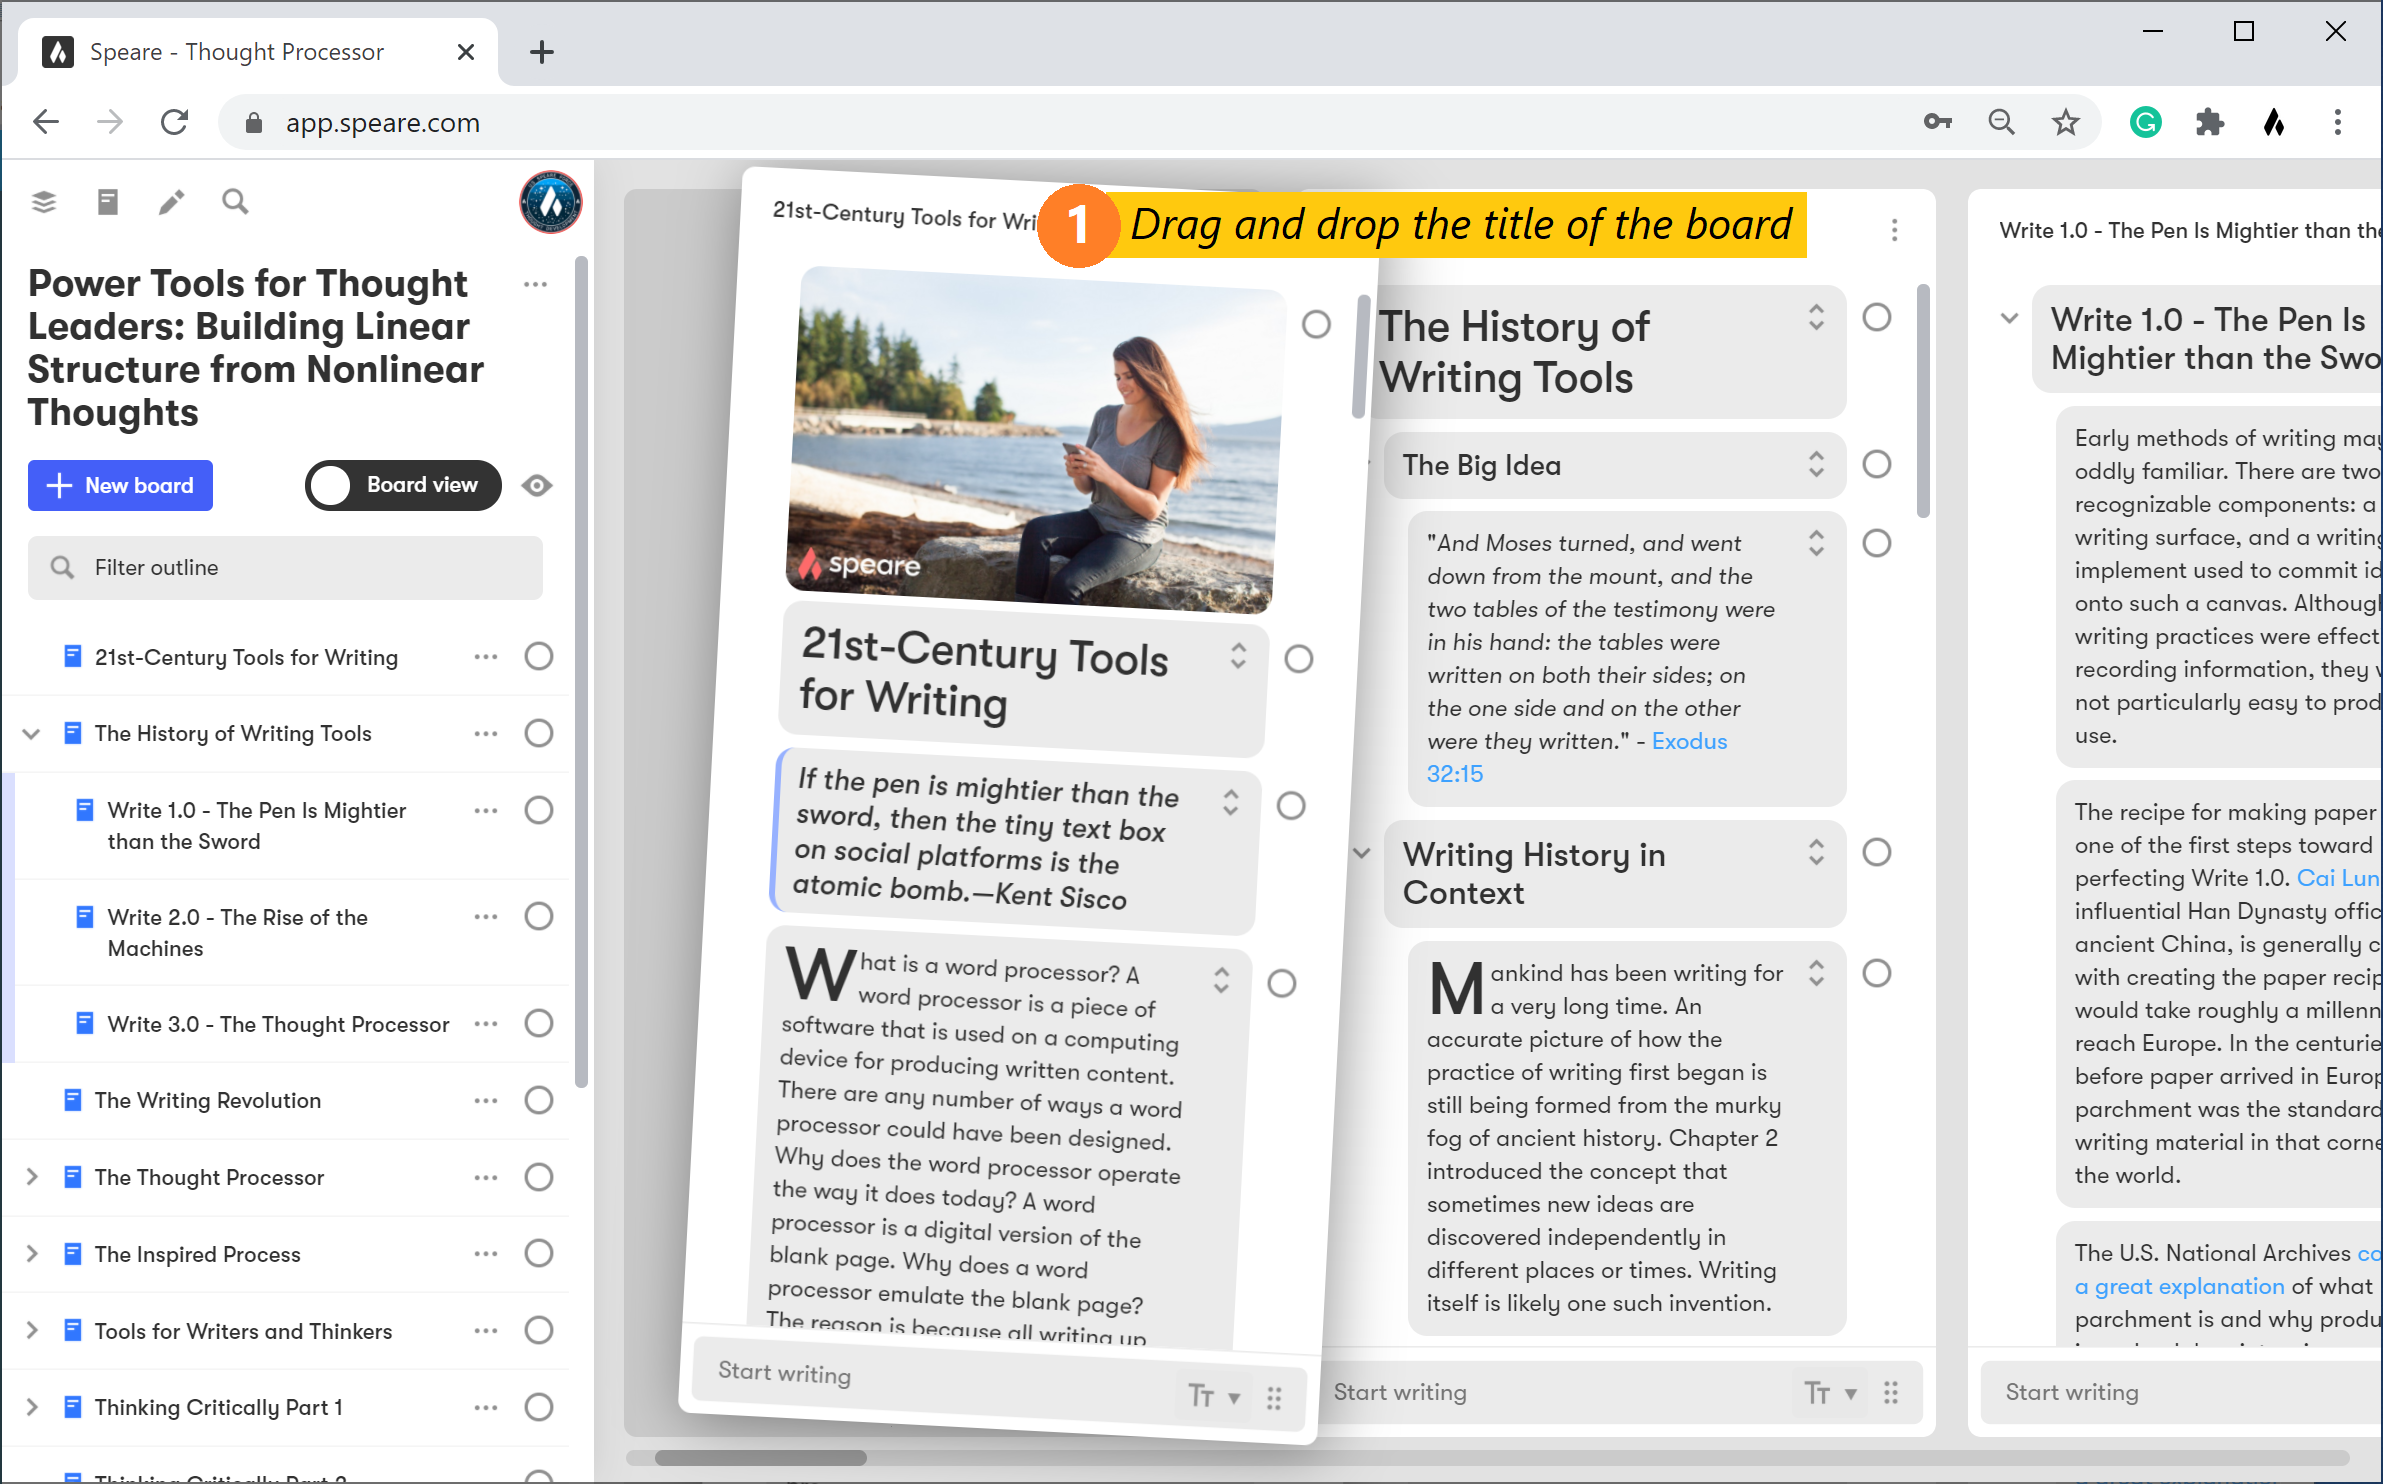
When you're toggled to "Boards view", the boards listed in the Outline and the boards in the Workspace are very loosely coupled. That means, you can rearrange the boards in the Workspace without affecting the order in the Outline. In fact, you can close all the boards in the Workspace without affecting the Document that is produced when you toggle the switch to "Doc view".
Feel free to open whatever boards you need to work with on your project and drag and drop them in any order that makes sense for working on your board content.
Positioning the text box—
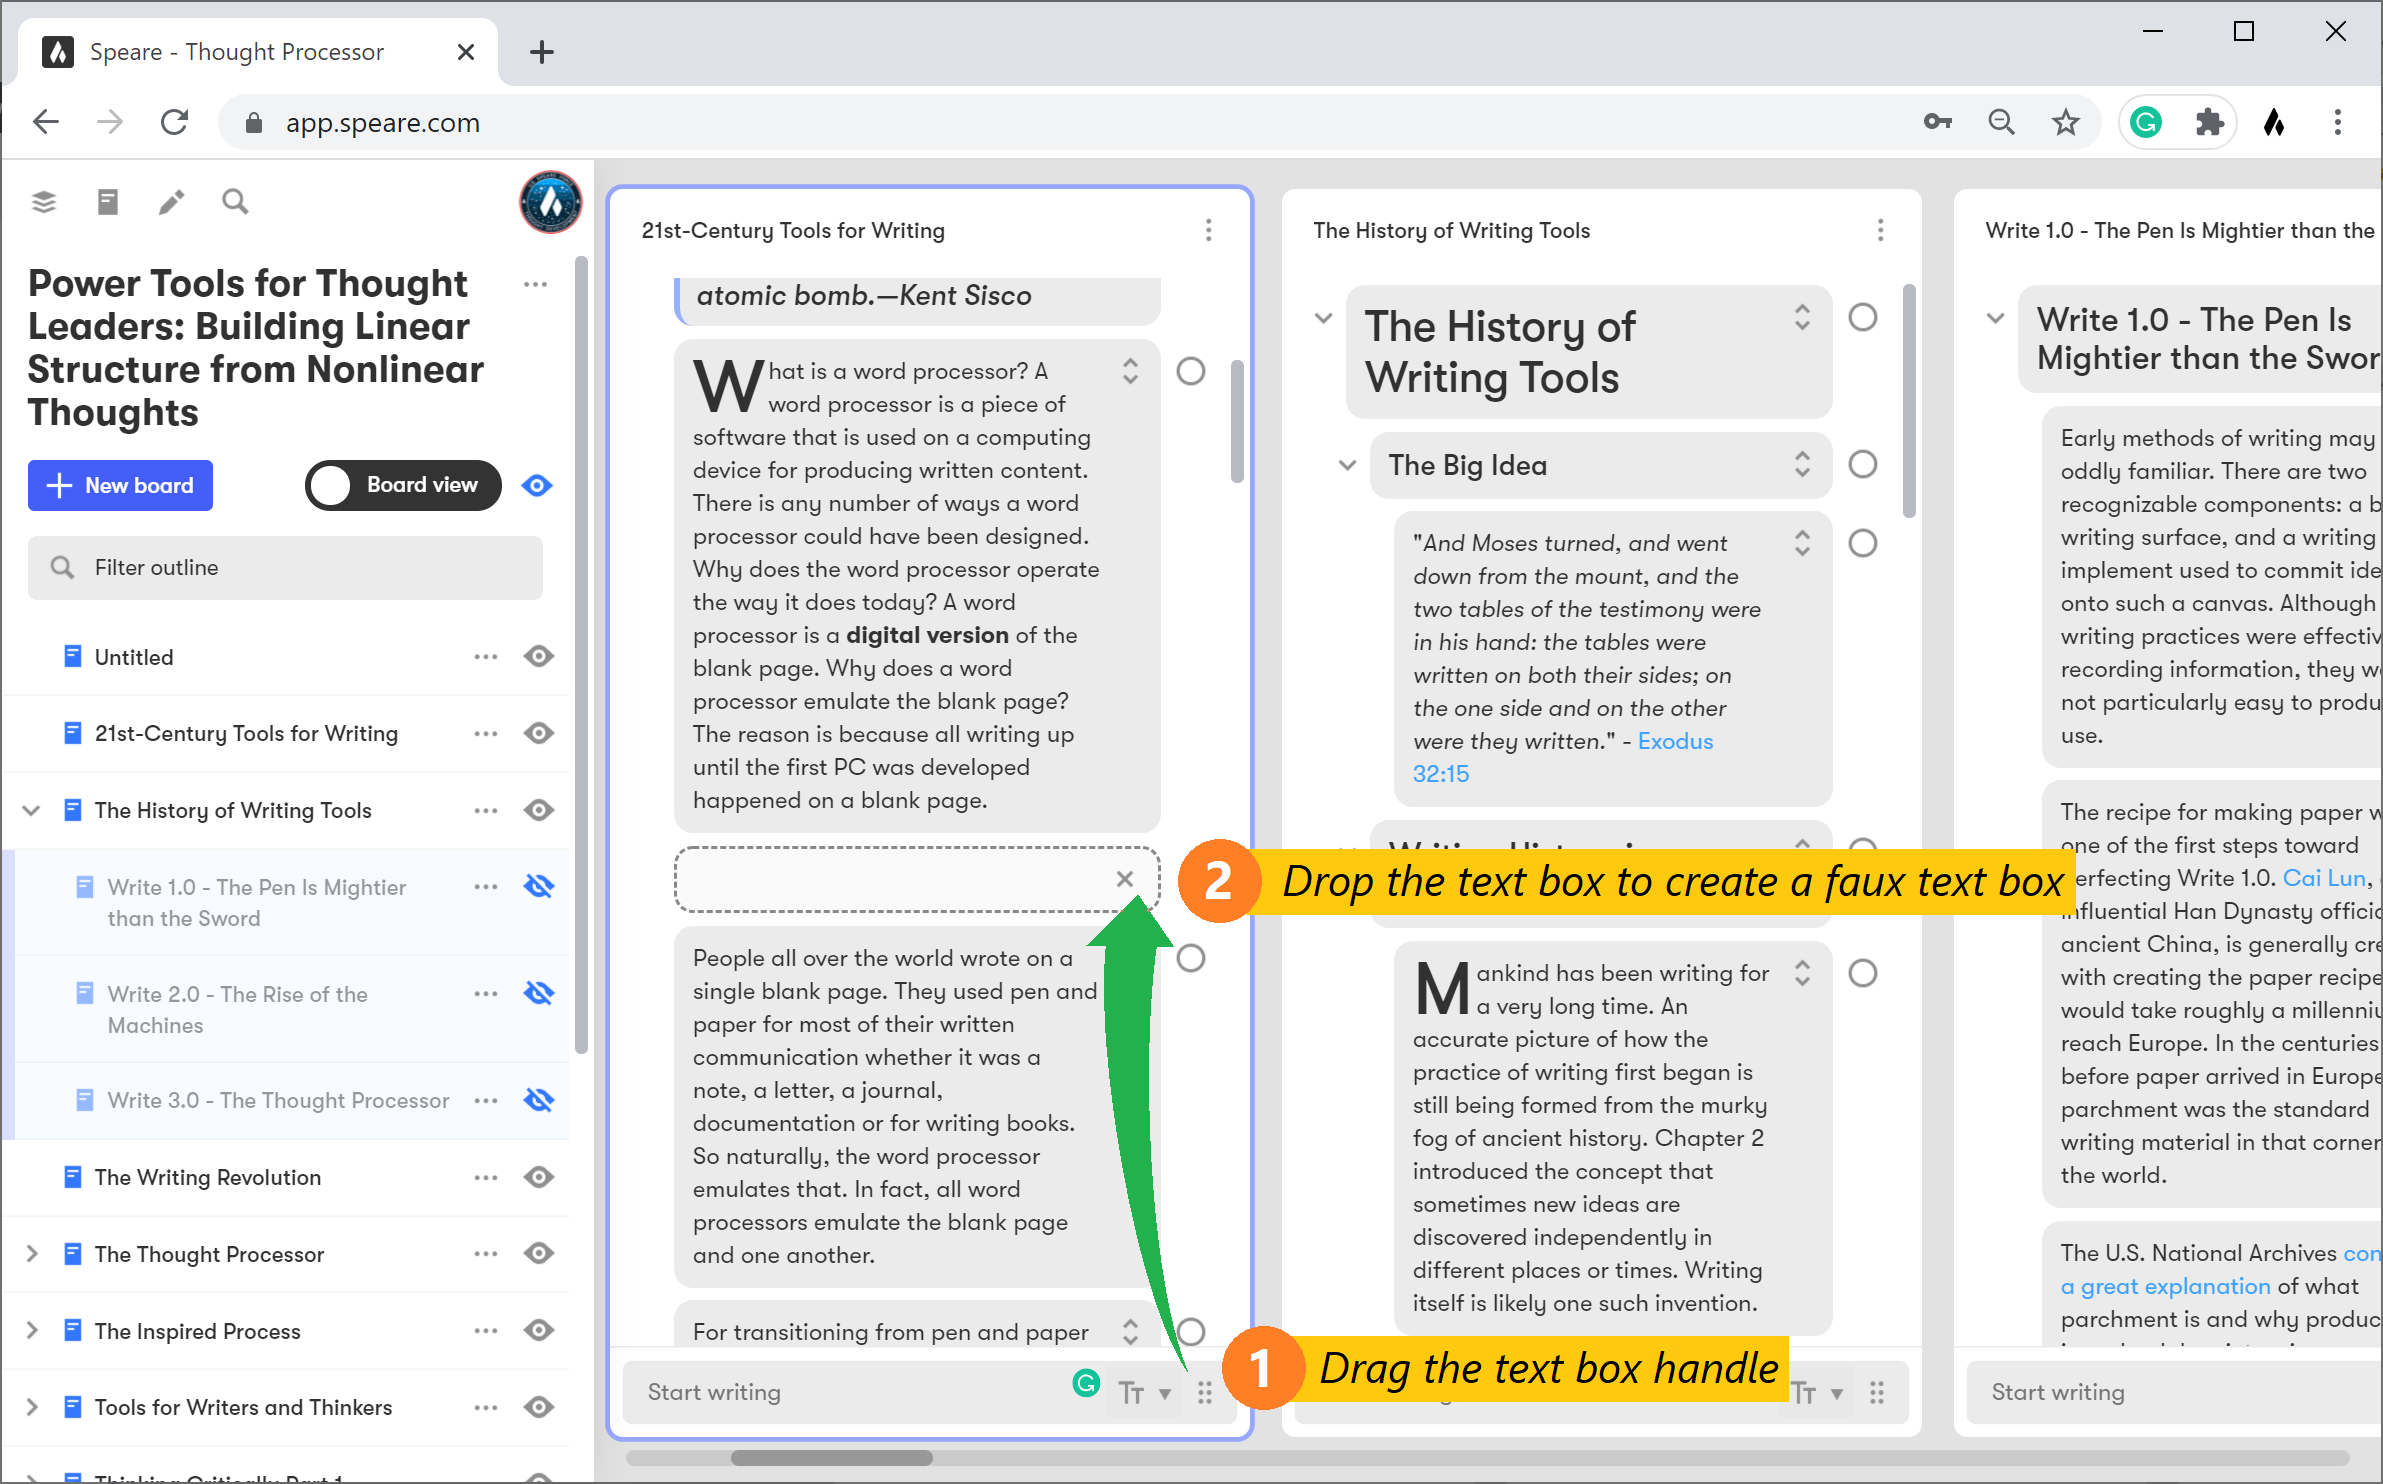
By default, every text you enter in Speare is placed at the bottom of the thread as the last item. This requires that you drag and drop the building block to the location it belongs if it doesn't belong at the bottom.
There is another method for setting the location where you want the text to go. You can drag and drop the handle of the text box to whatever location you want on the board. Every text entry will get placed beginning at that location on down until you hit the "X" on the faux text box.
Note: you are still entering your text at the bottom of the board, but with the faux text box positioning, you are setting the location of where the text will appear on hitting "Enter".
Uploading images to a board
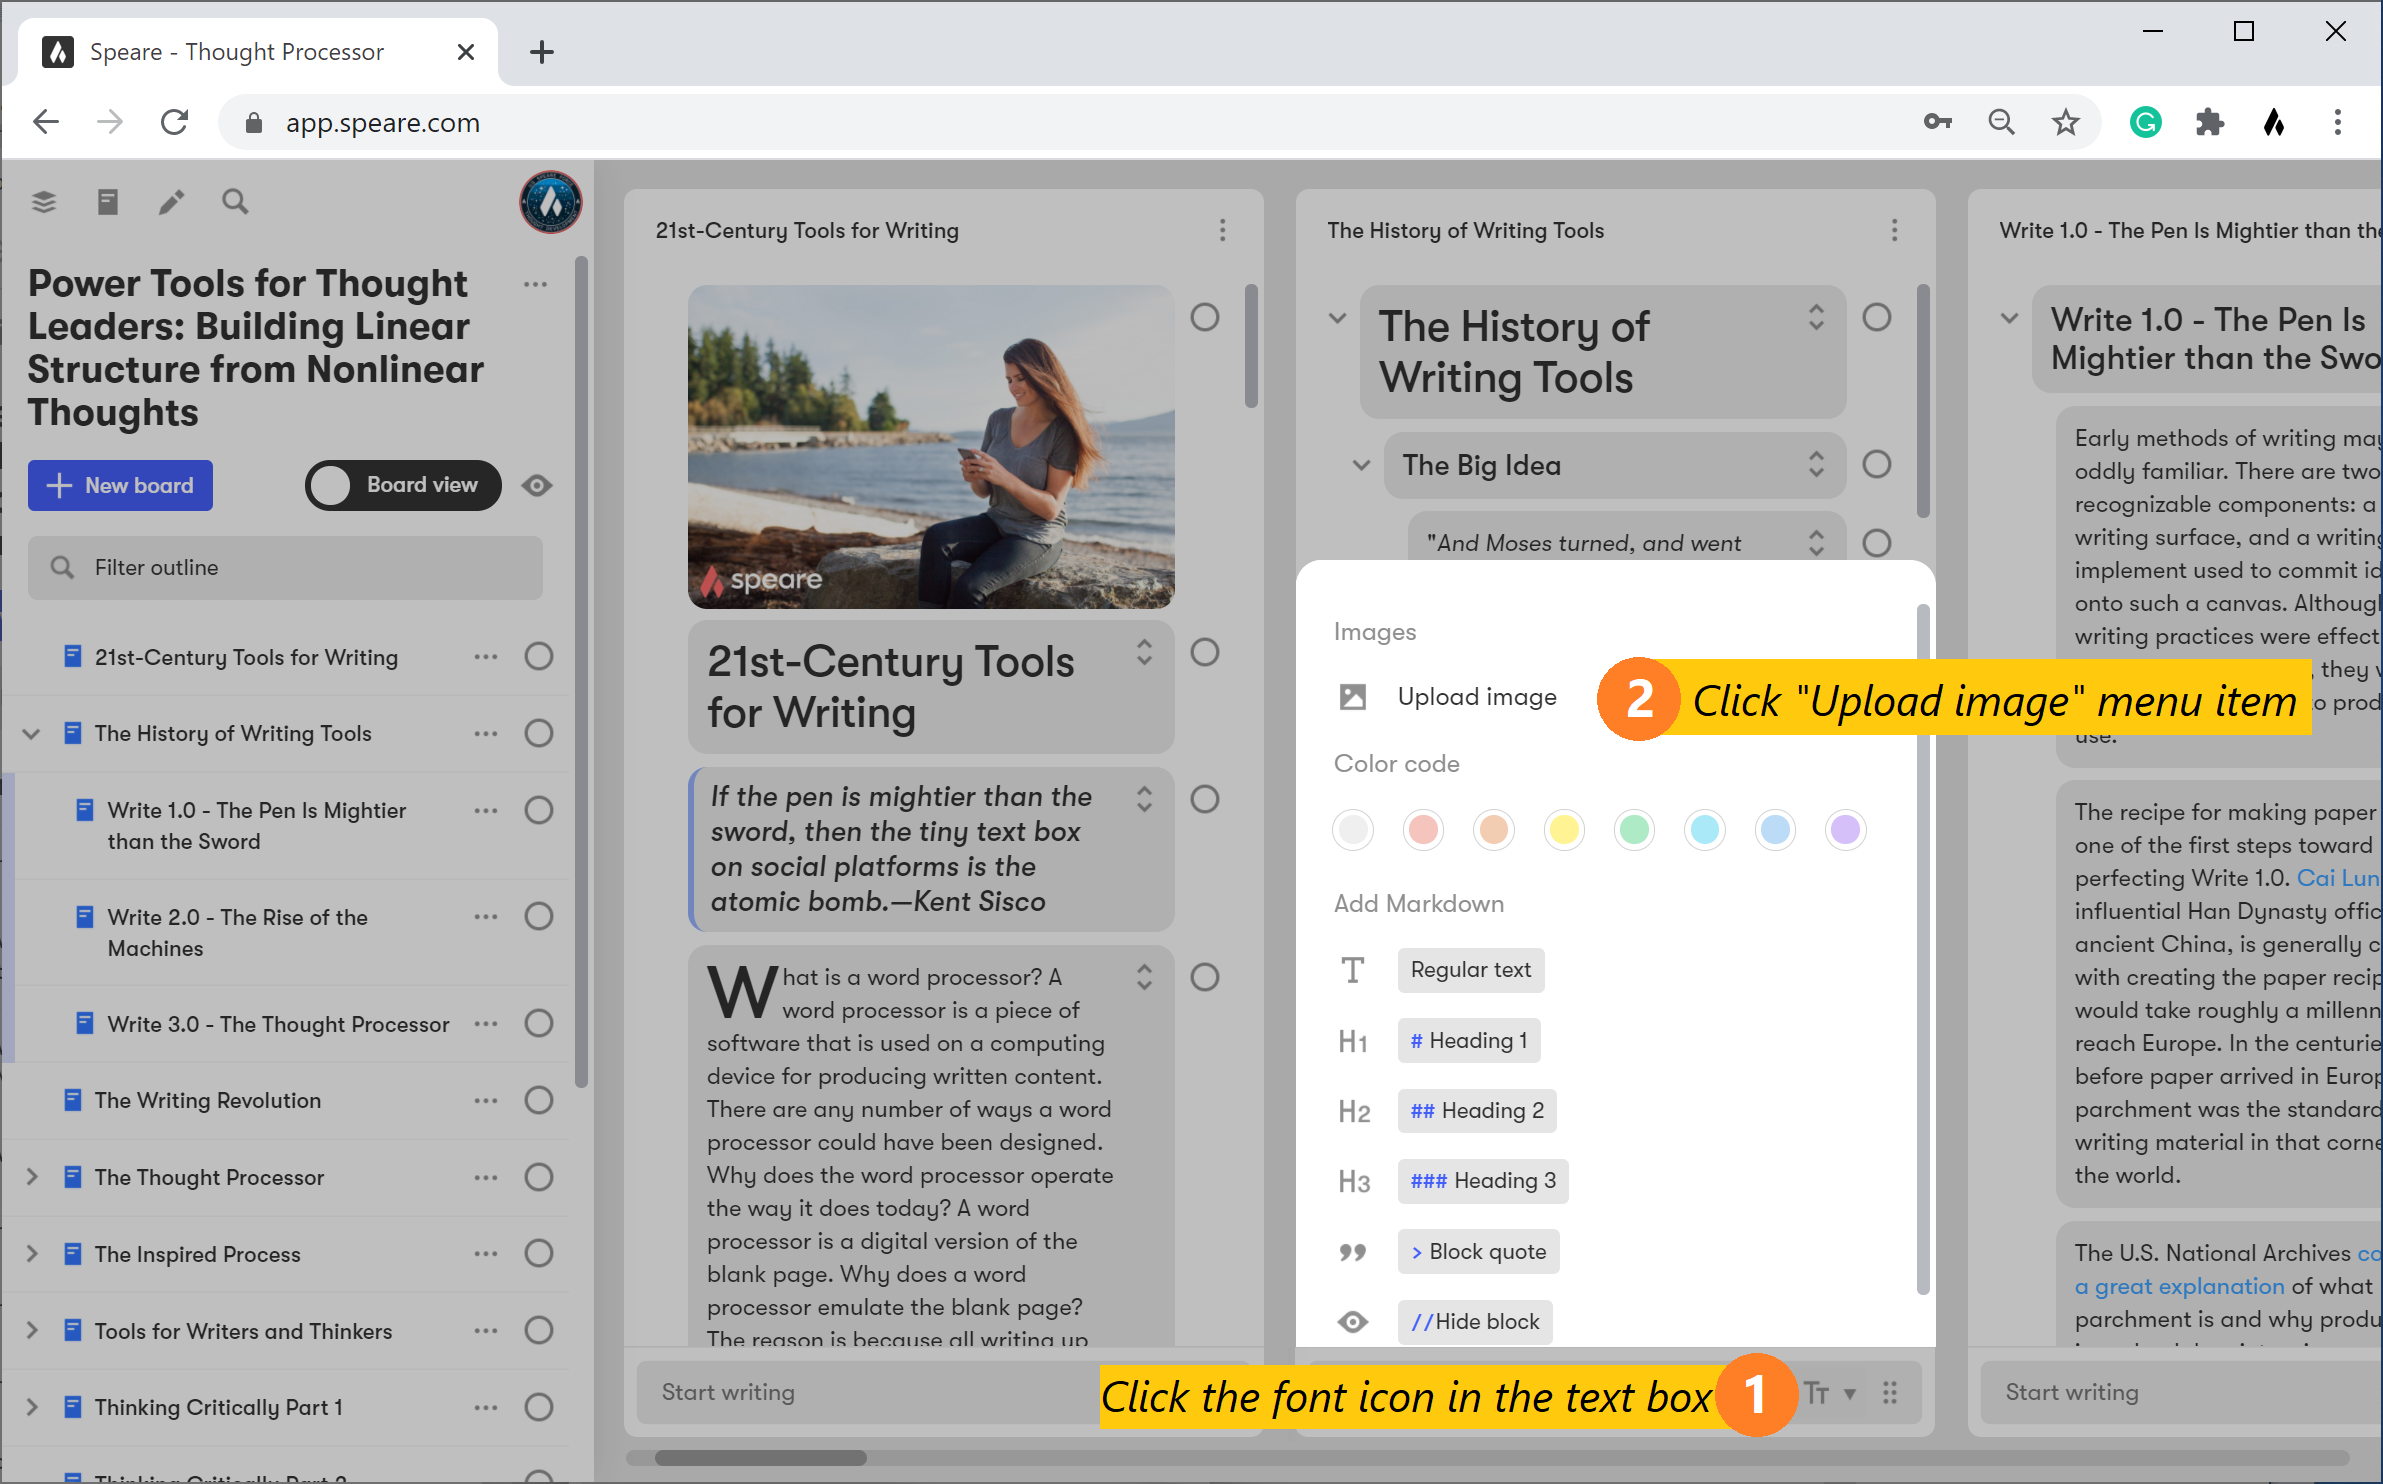
You can upload 1 or more images at the same time to a Board. The images become movable building blocks on the board. To add images to your boards, use the following steps...
Speare will upload each of the images at the bottom of the board.
Note: do not move the image building blocks until they are fully uploaded.
//Working with Building Blocks
Multi-selecting building blocks

Moving building blocks
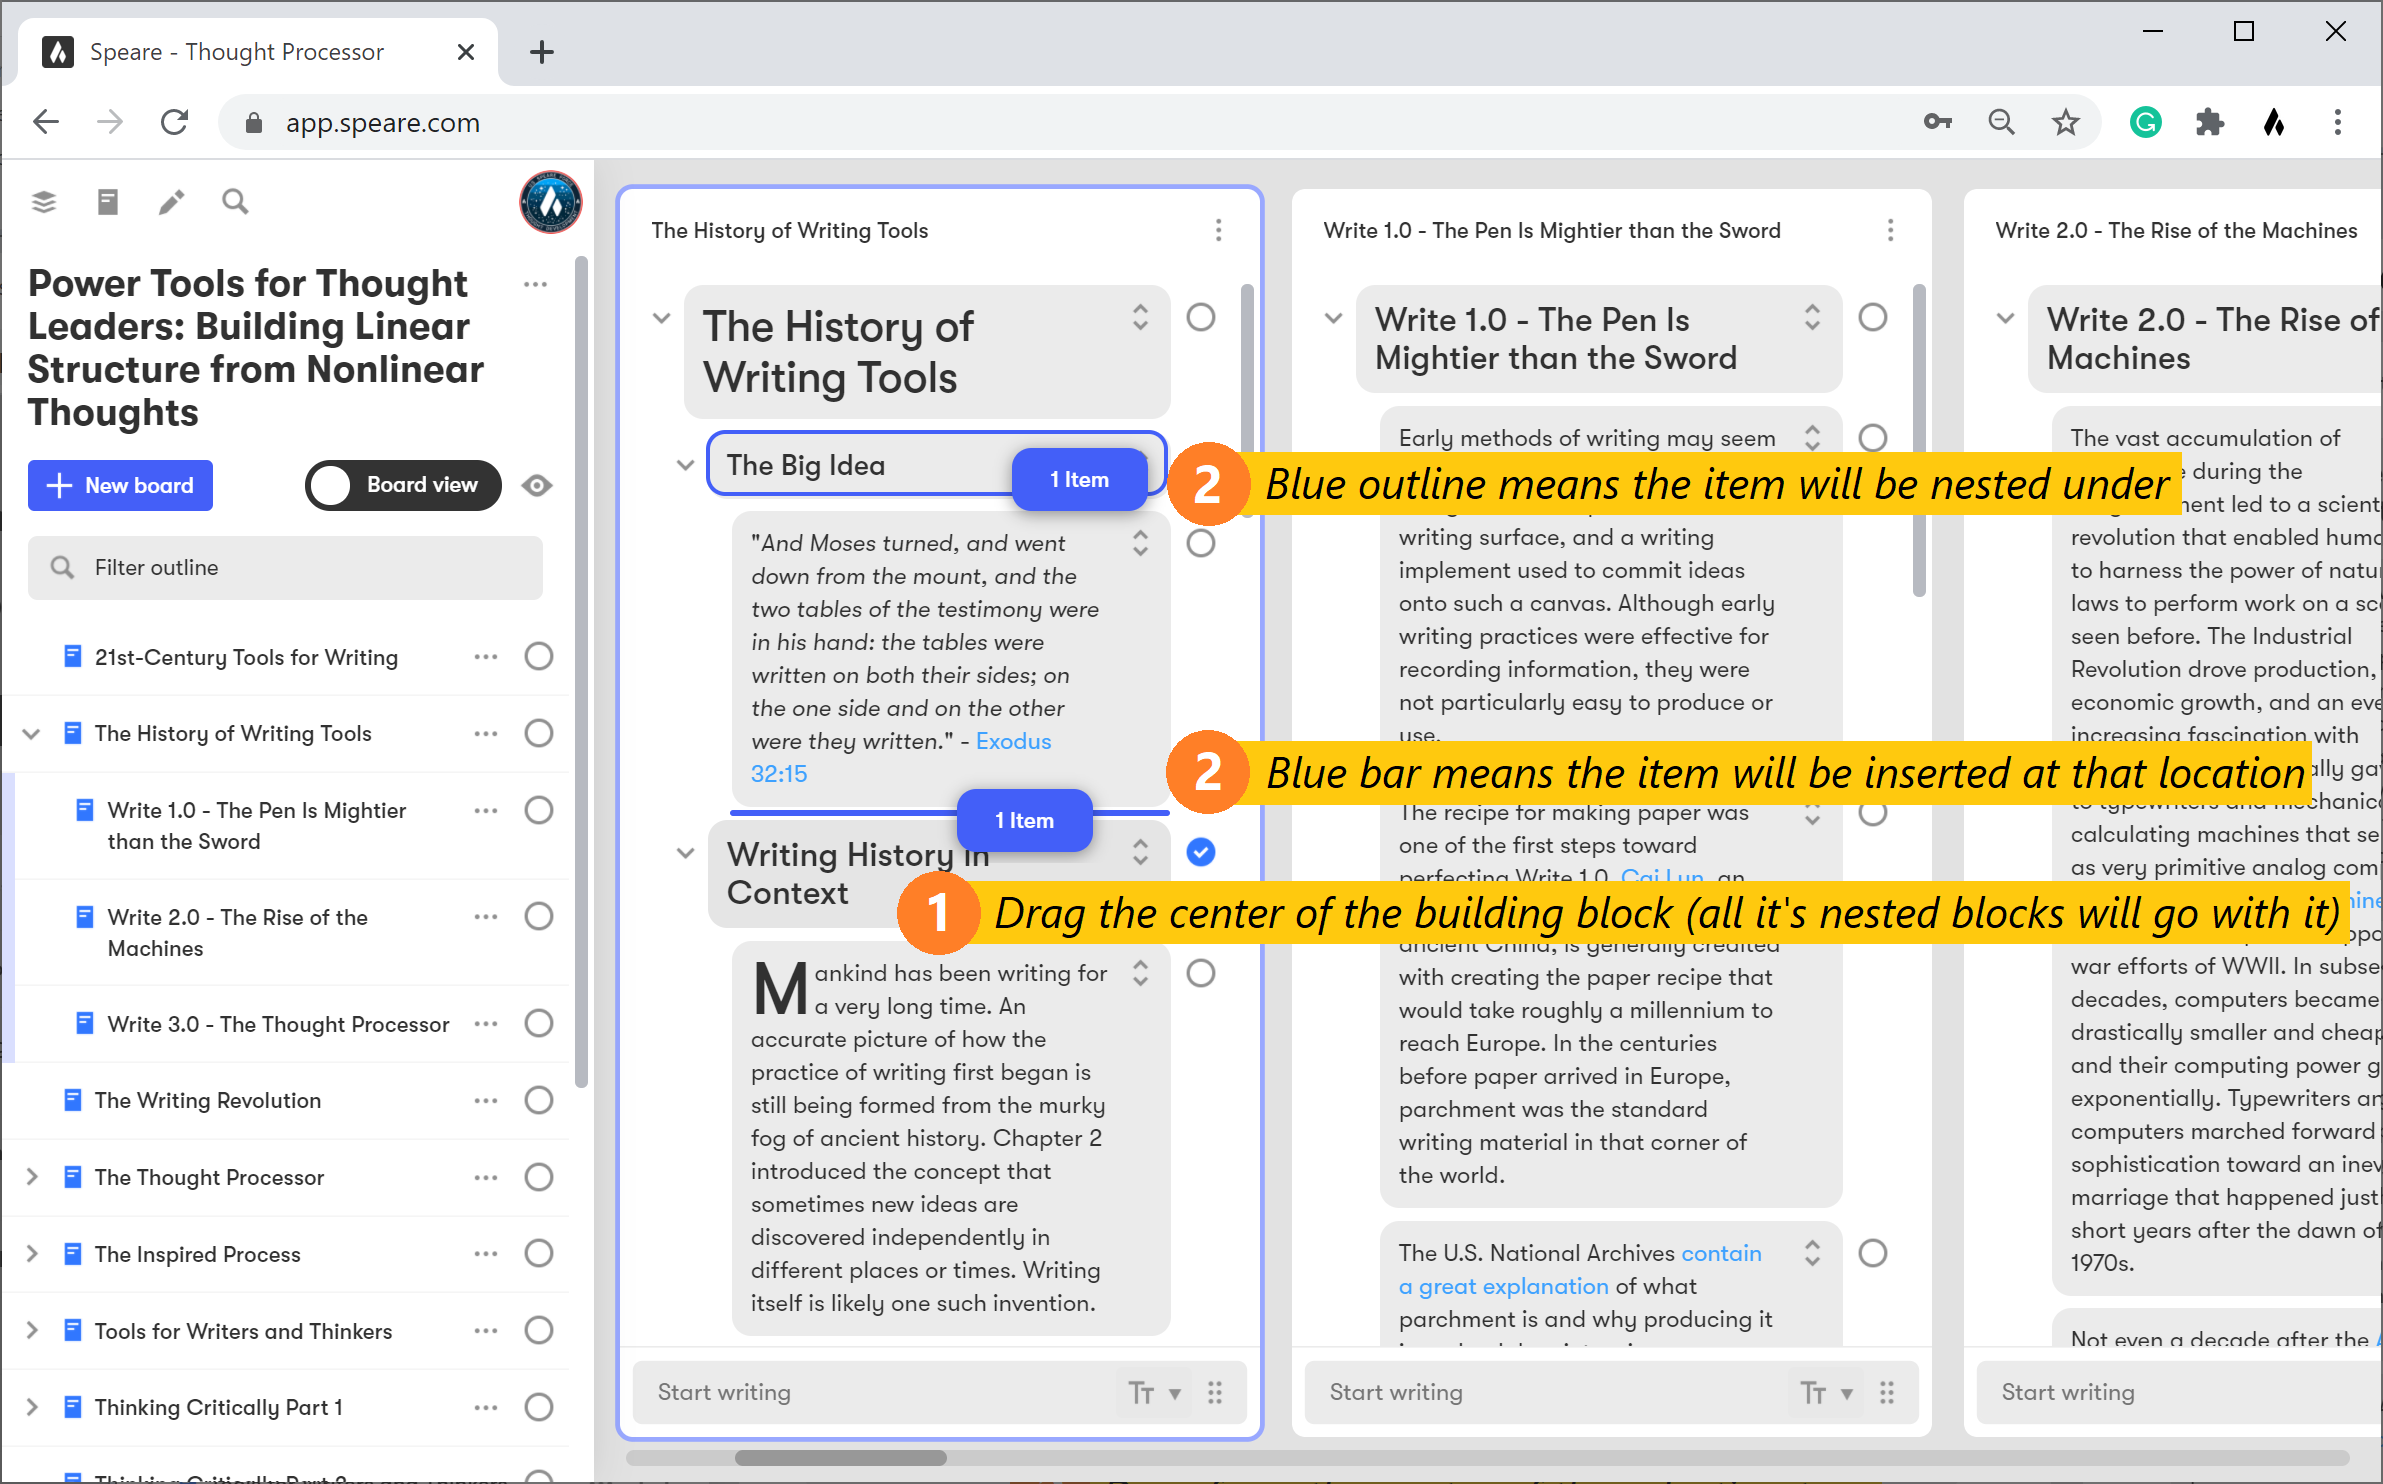
The ability to move building blocks is what allows you to get your thoughts and ideas written down super fast and then to organize them into their respective threads of thoughts. There are three different blue indicators that can be displayed as you move a building block...
Multi-selection building block move
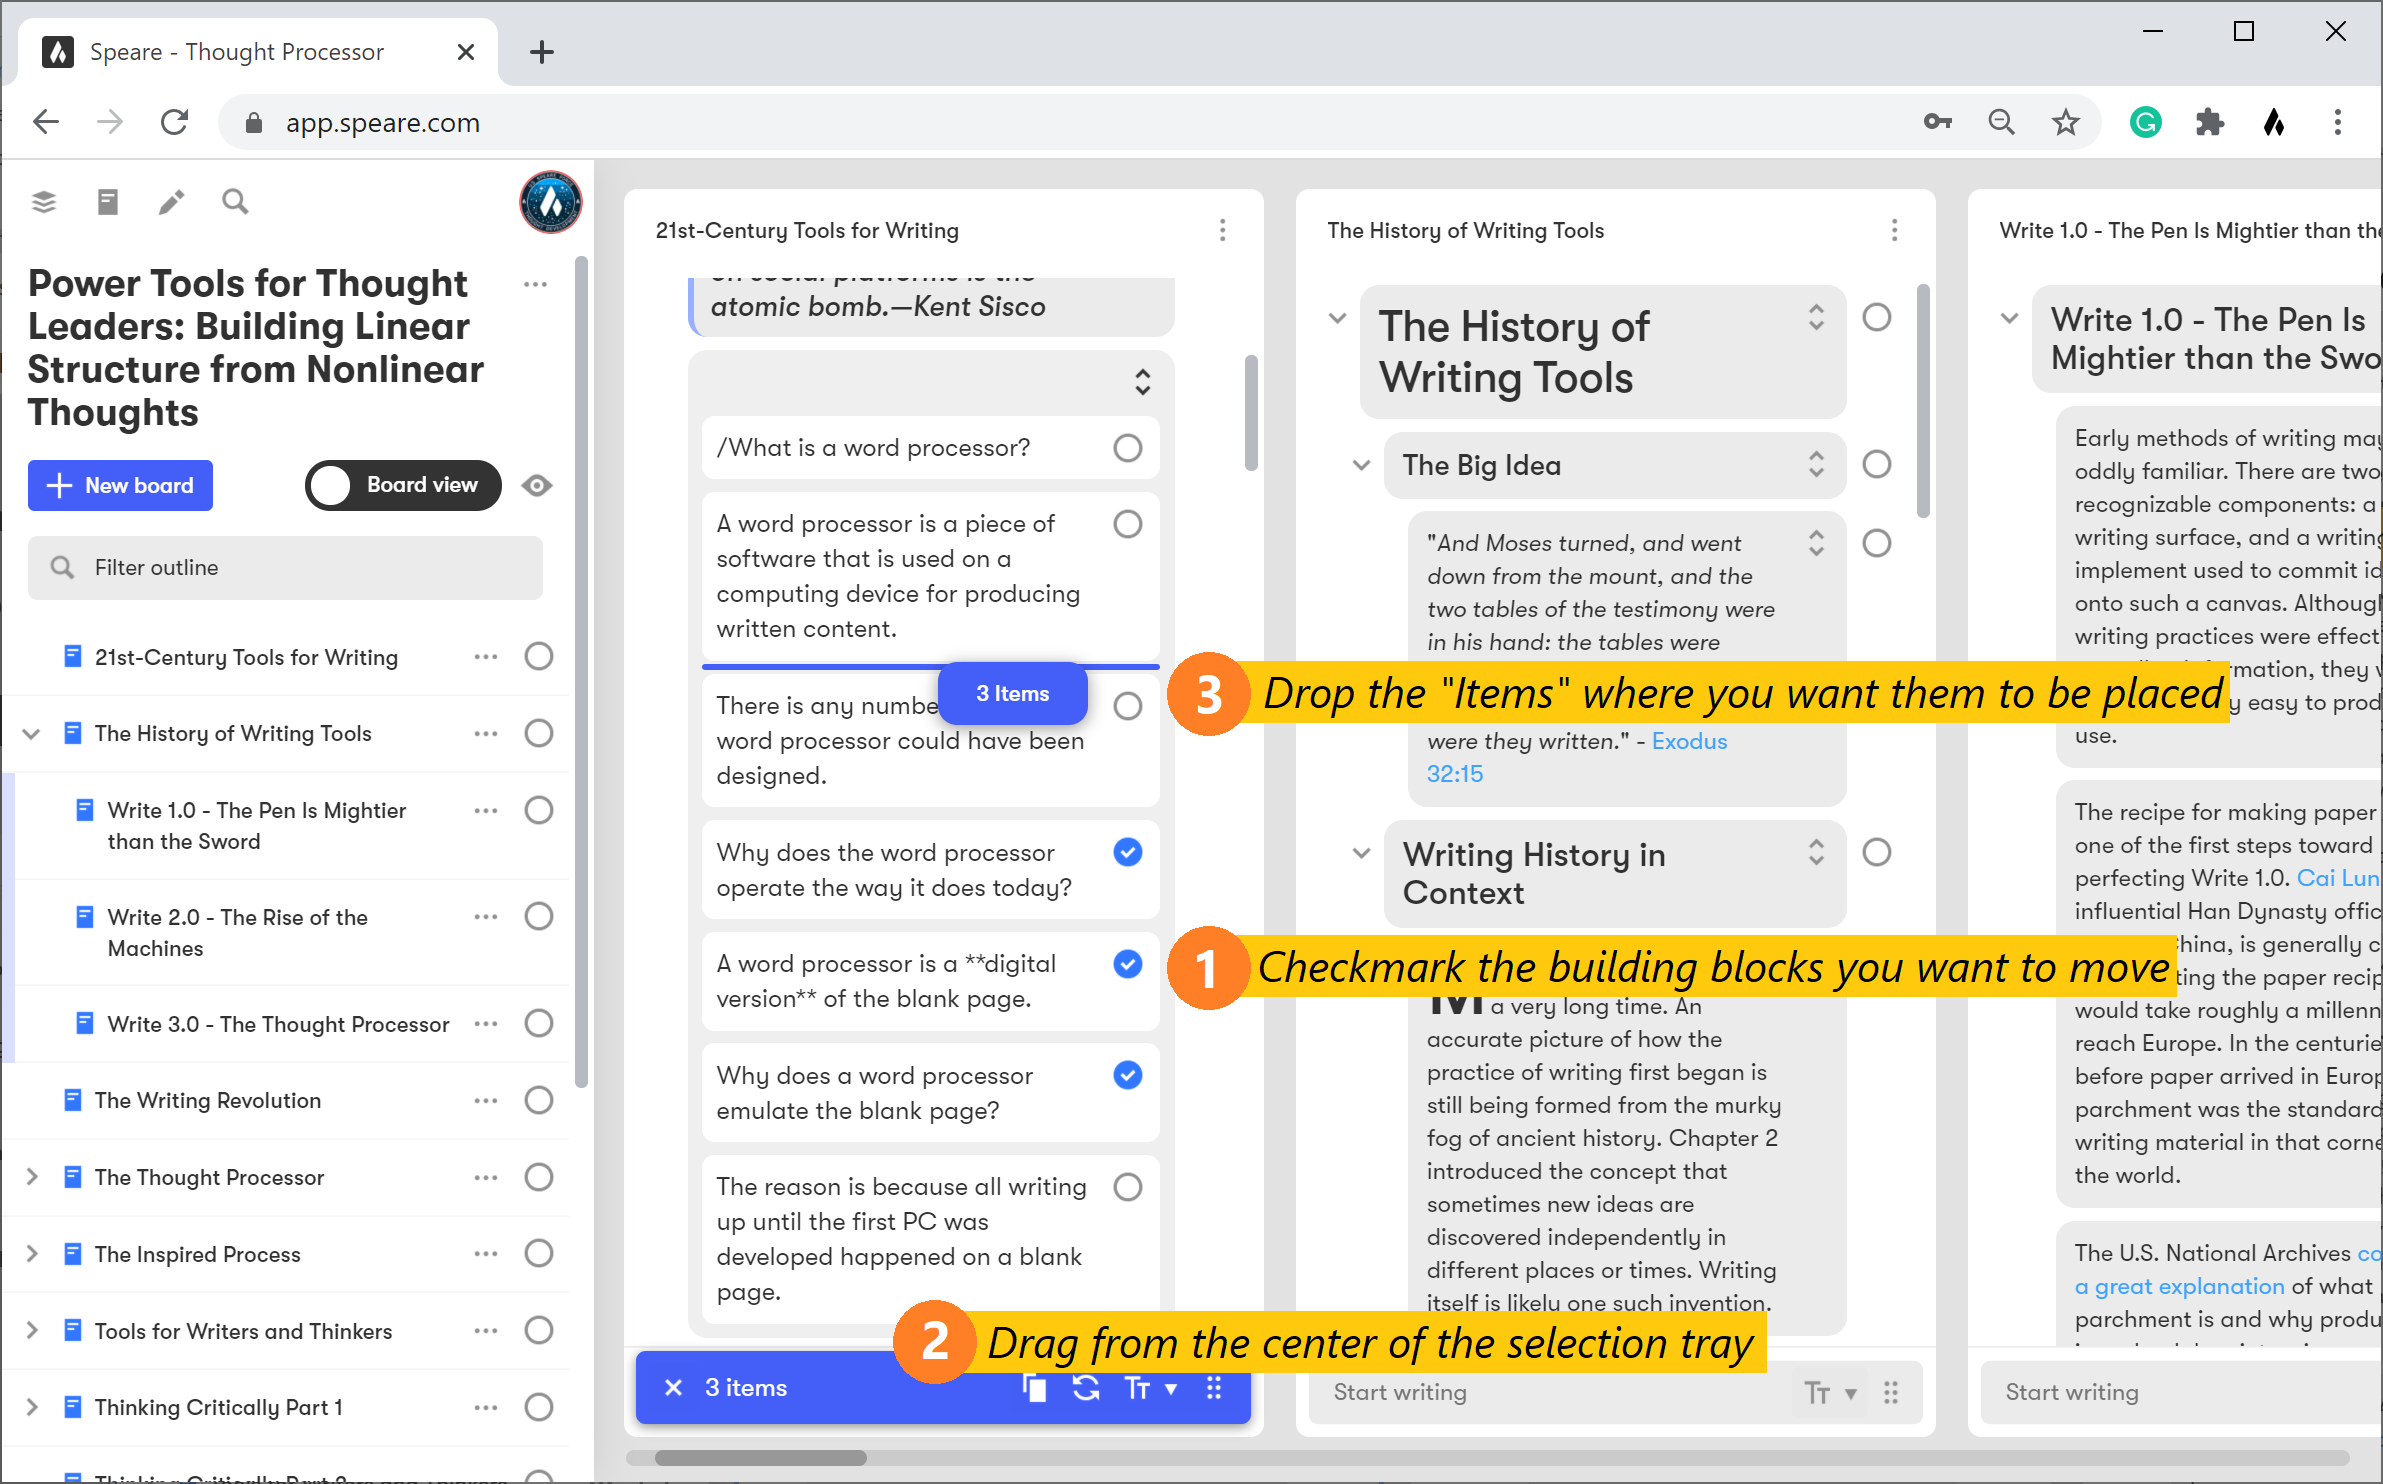
To move more than one building block at a time, you need to 1) checkmark the building blocks you want to move; 2) drag the selection tray at the bottom of the board; 3) drop the selected items to the position you want.
*Note: whenever you do a multi-selection move on the desktop or a move on your phone, you'll need to drag the selection tray to move the building blocks. On the desktop only, you can drag individual building blocks without the selection tray. *
Splitting building blocks
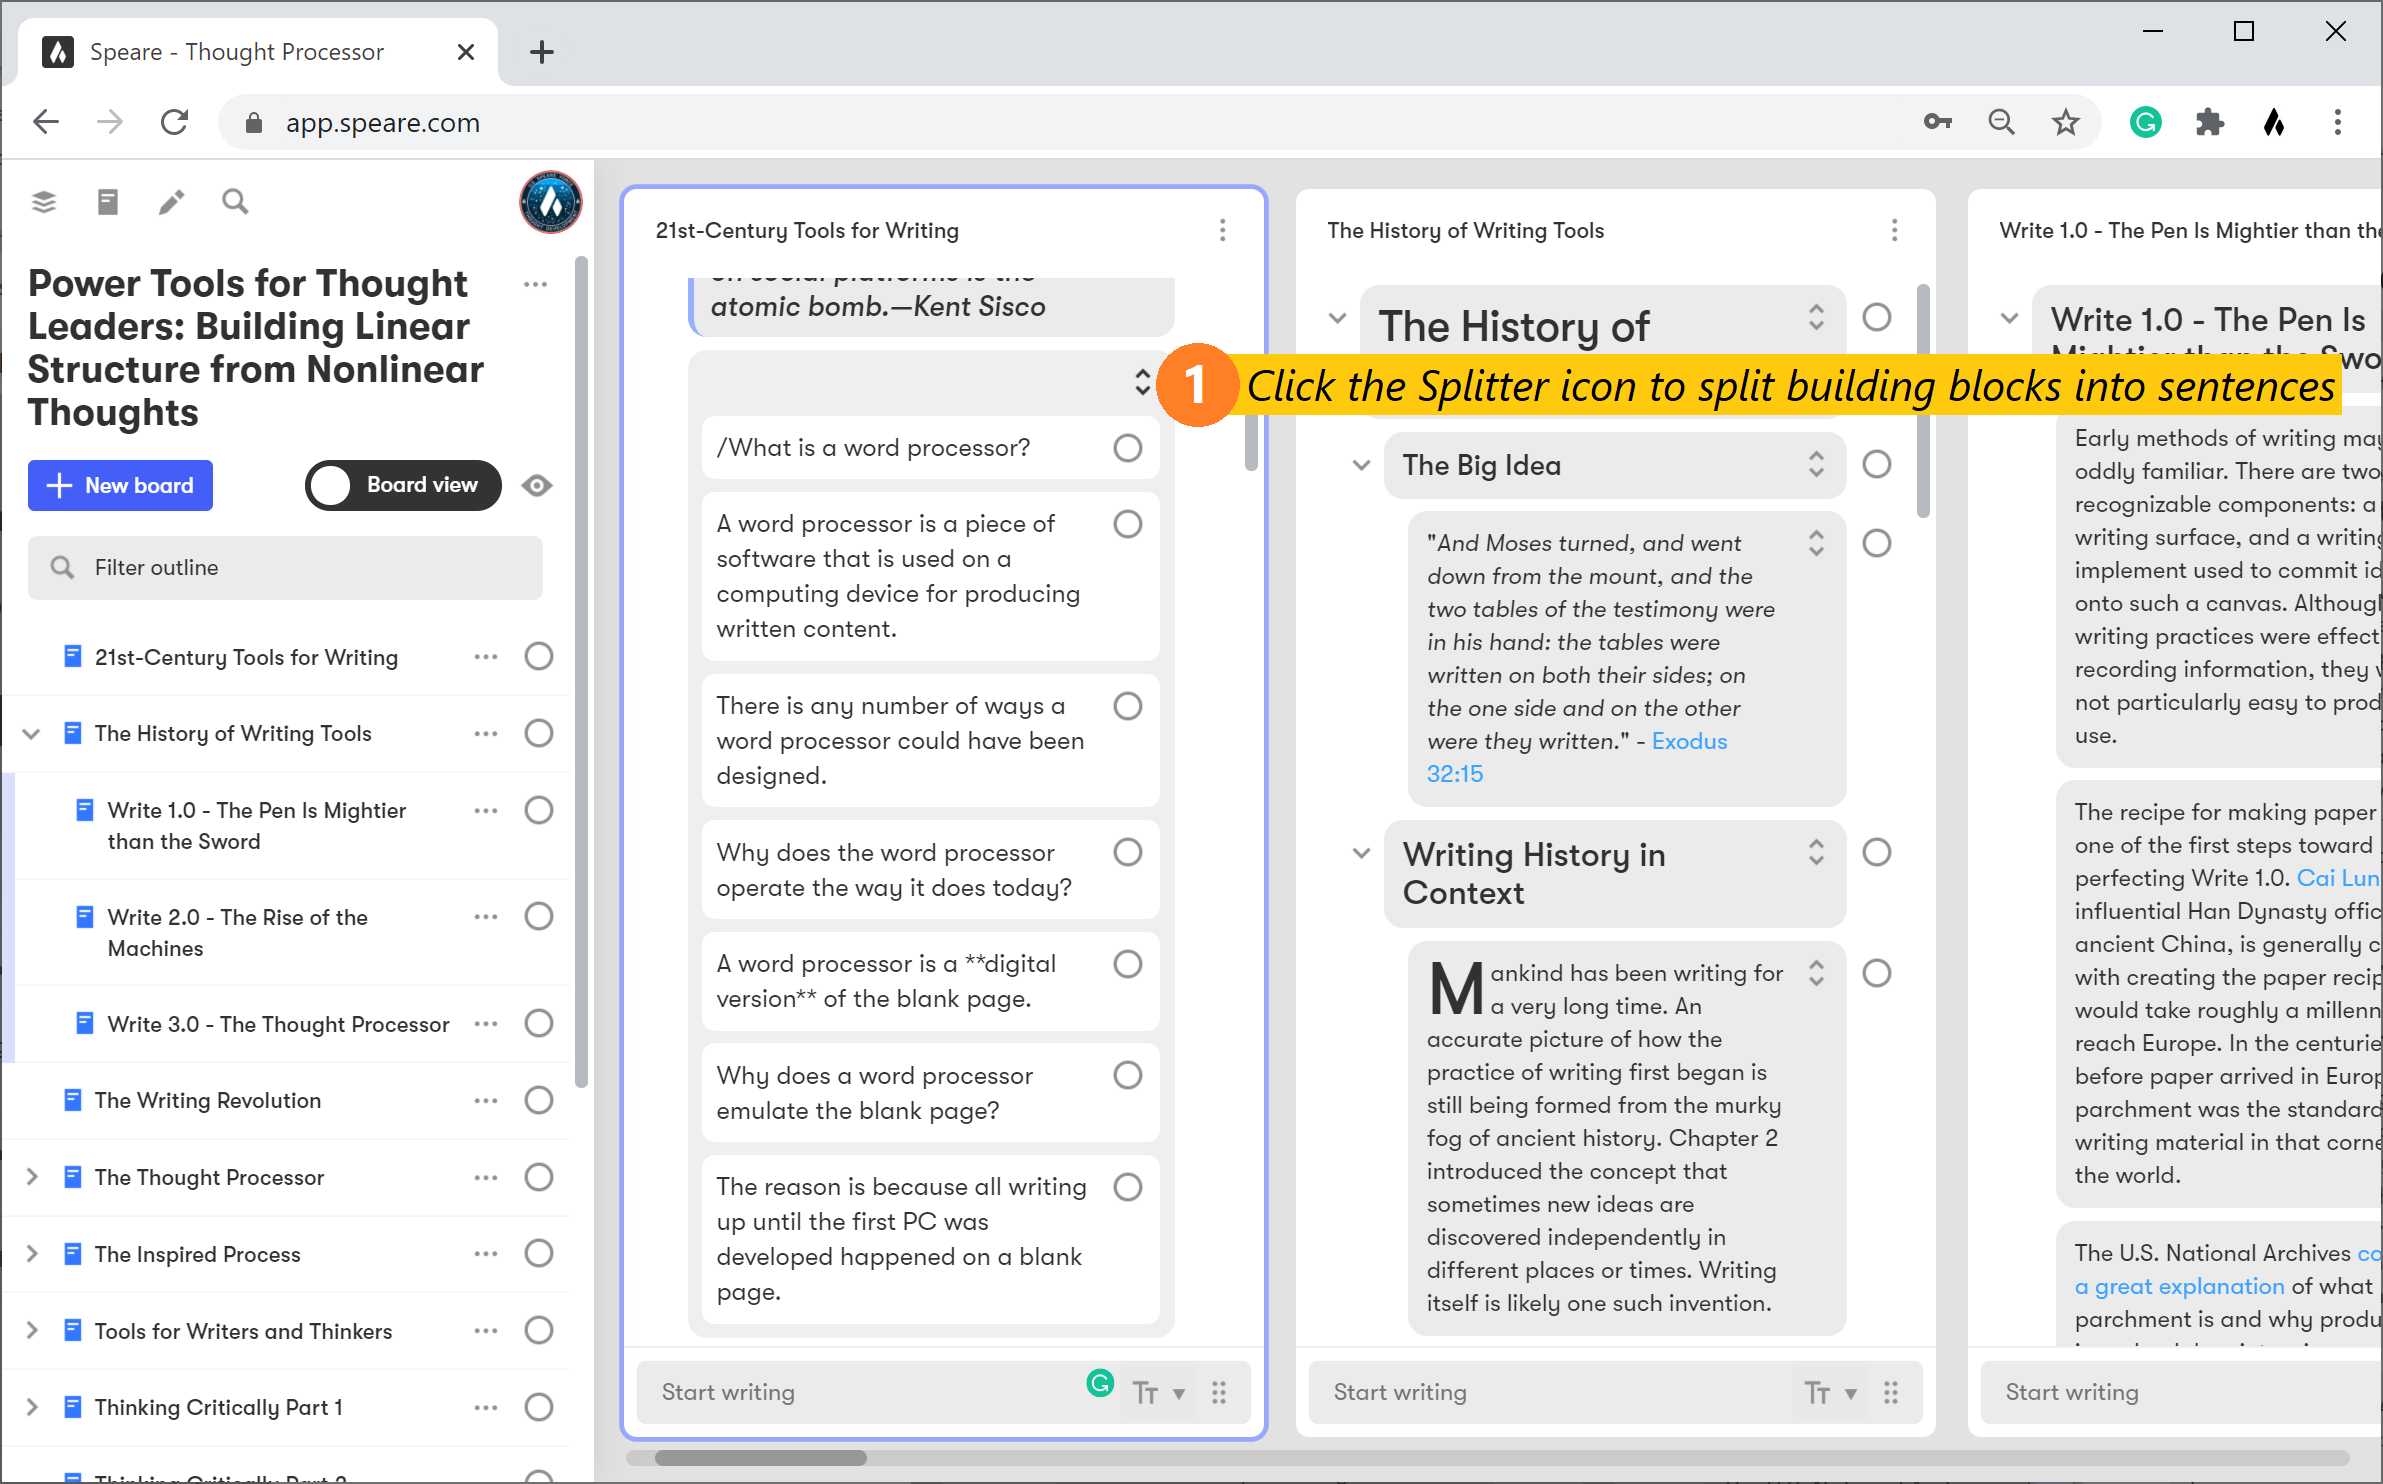
The ability to split a building block paragraph into separate sentences has several benefits...
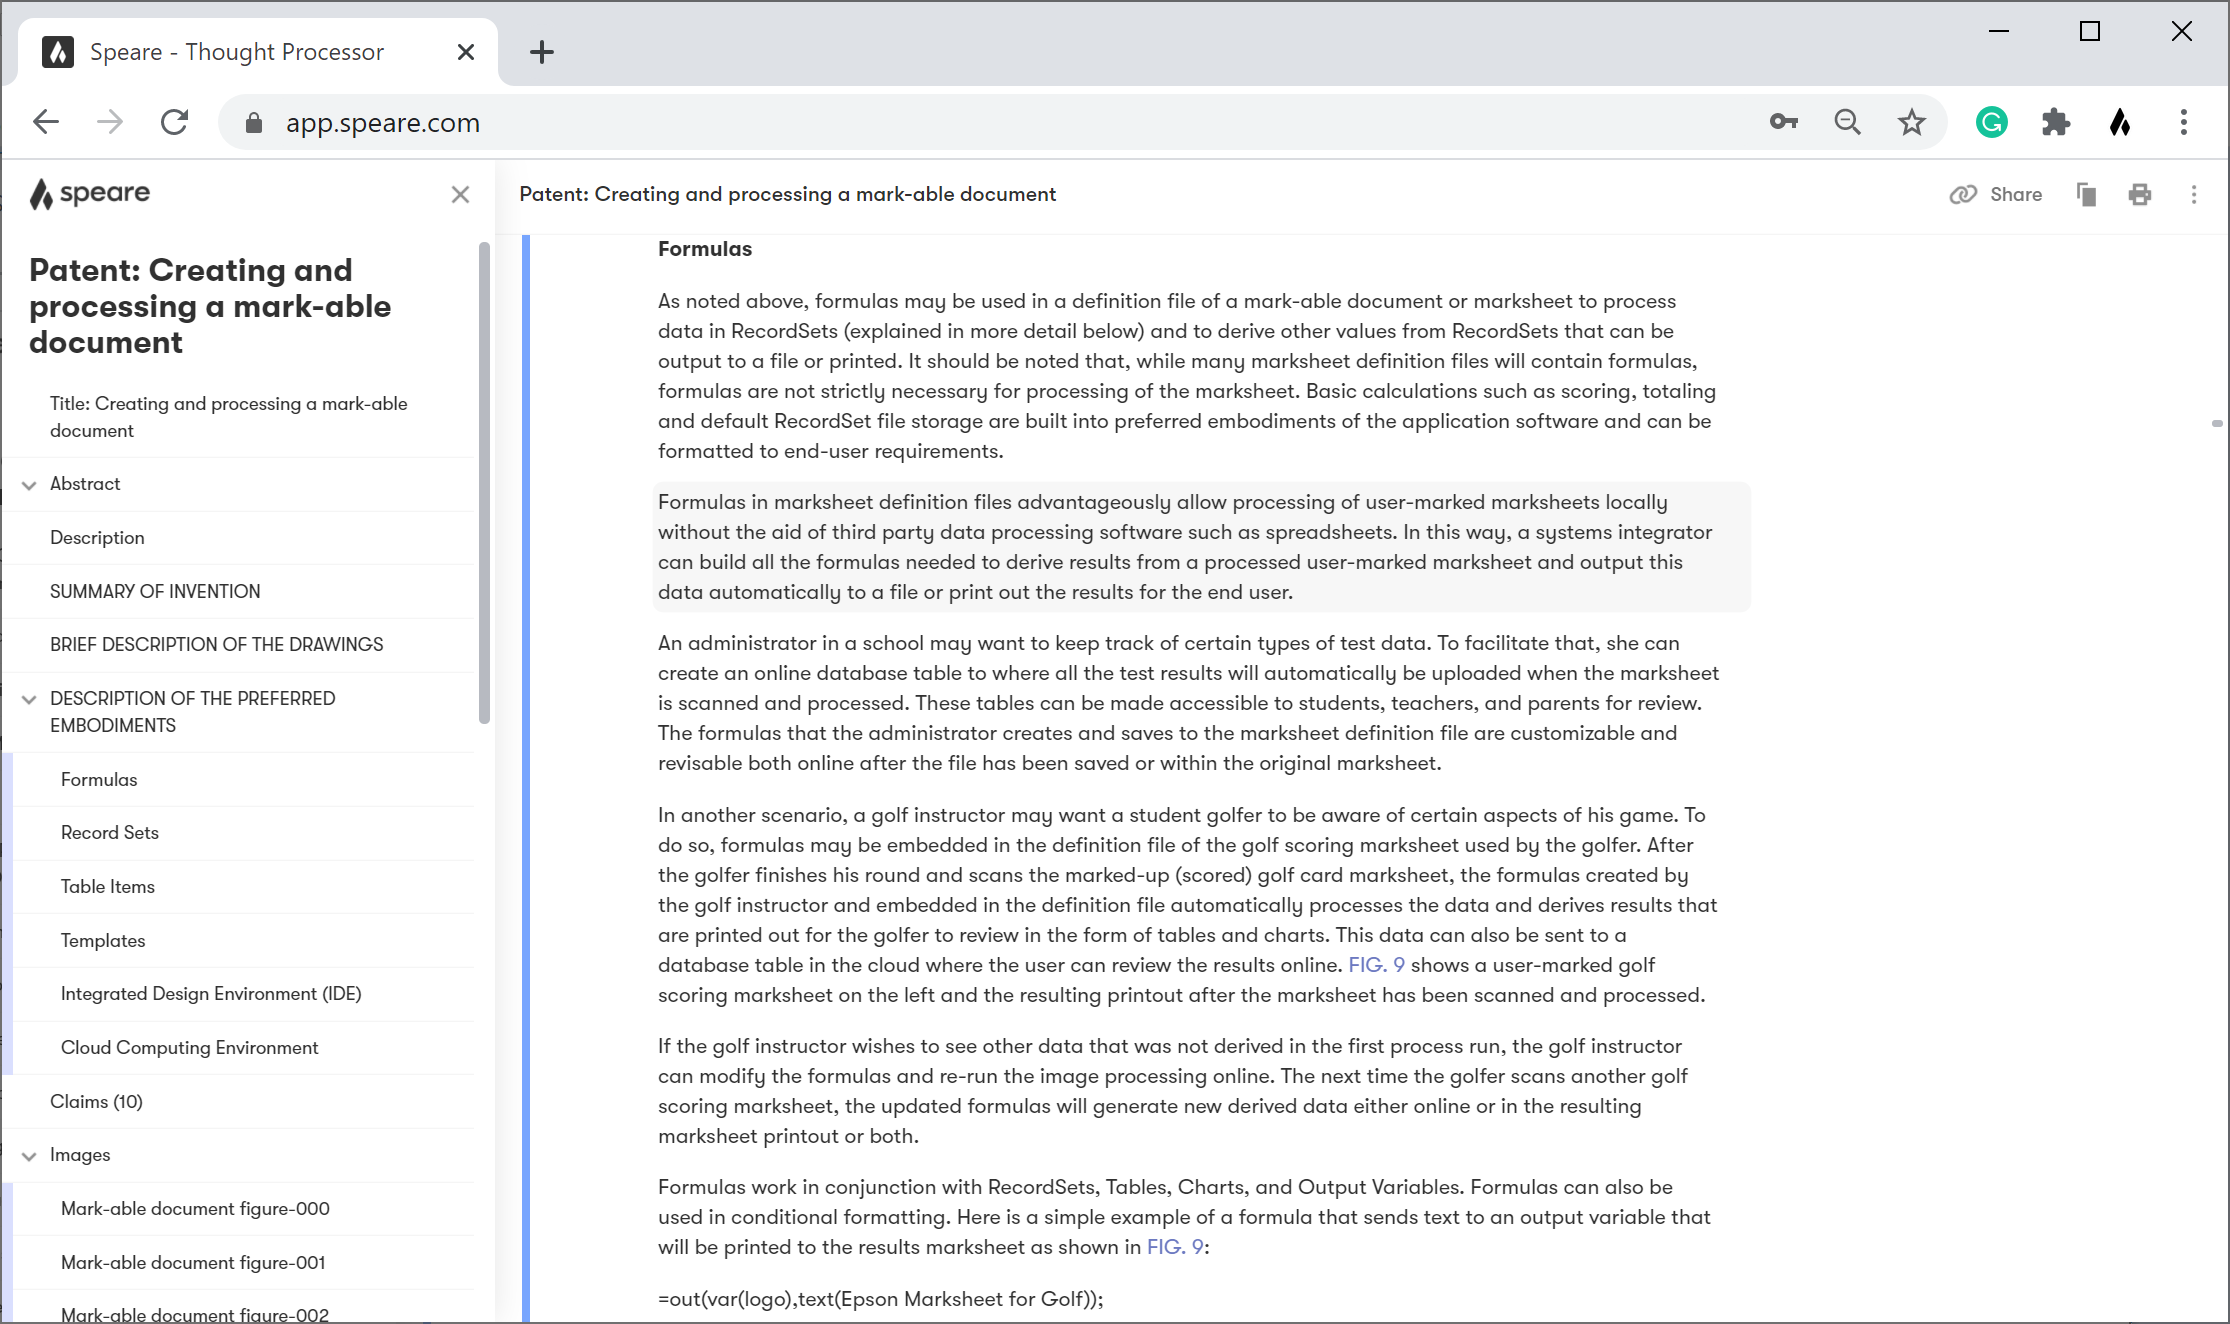
Formatting building blocks
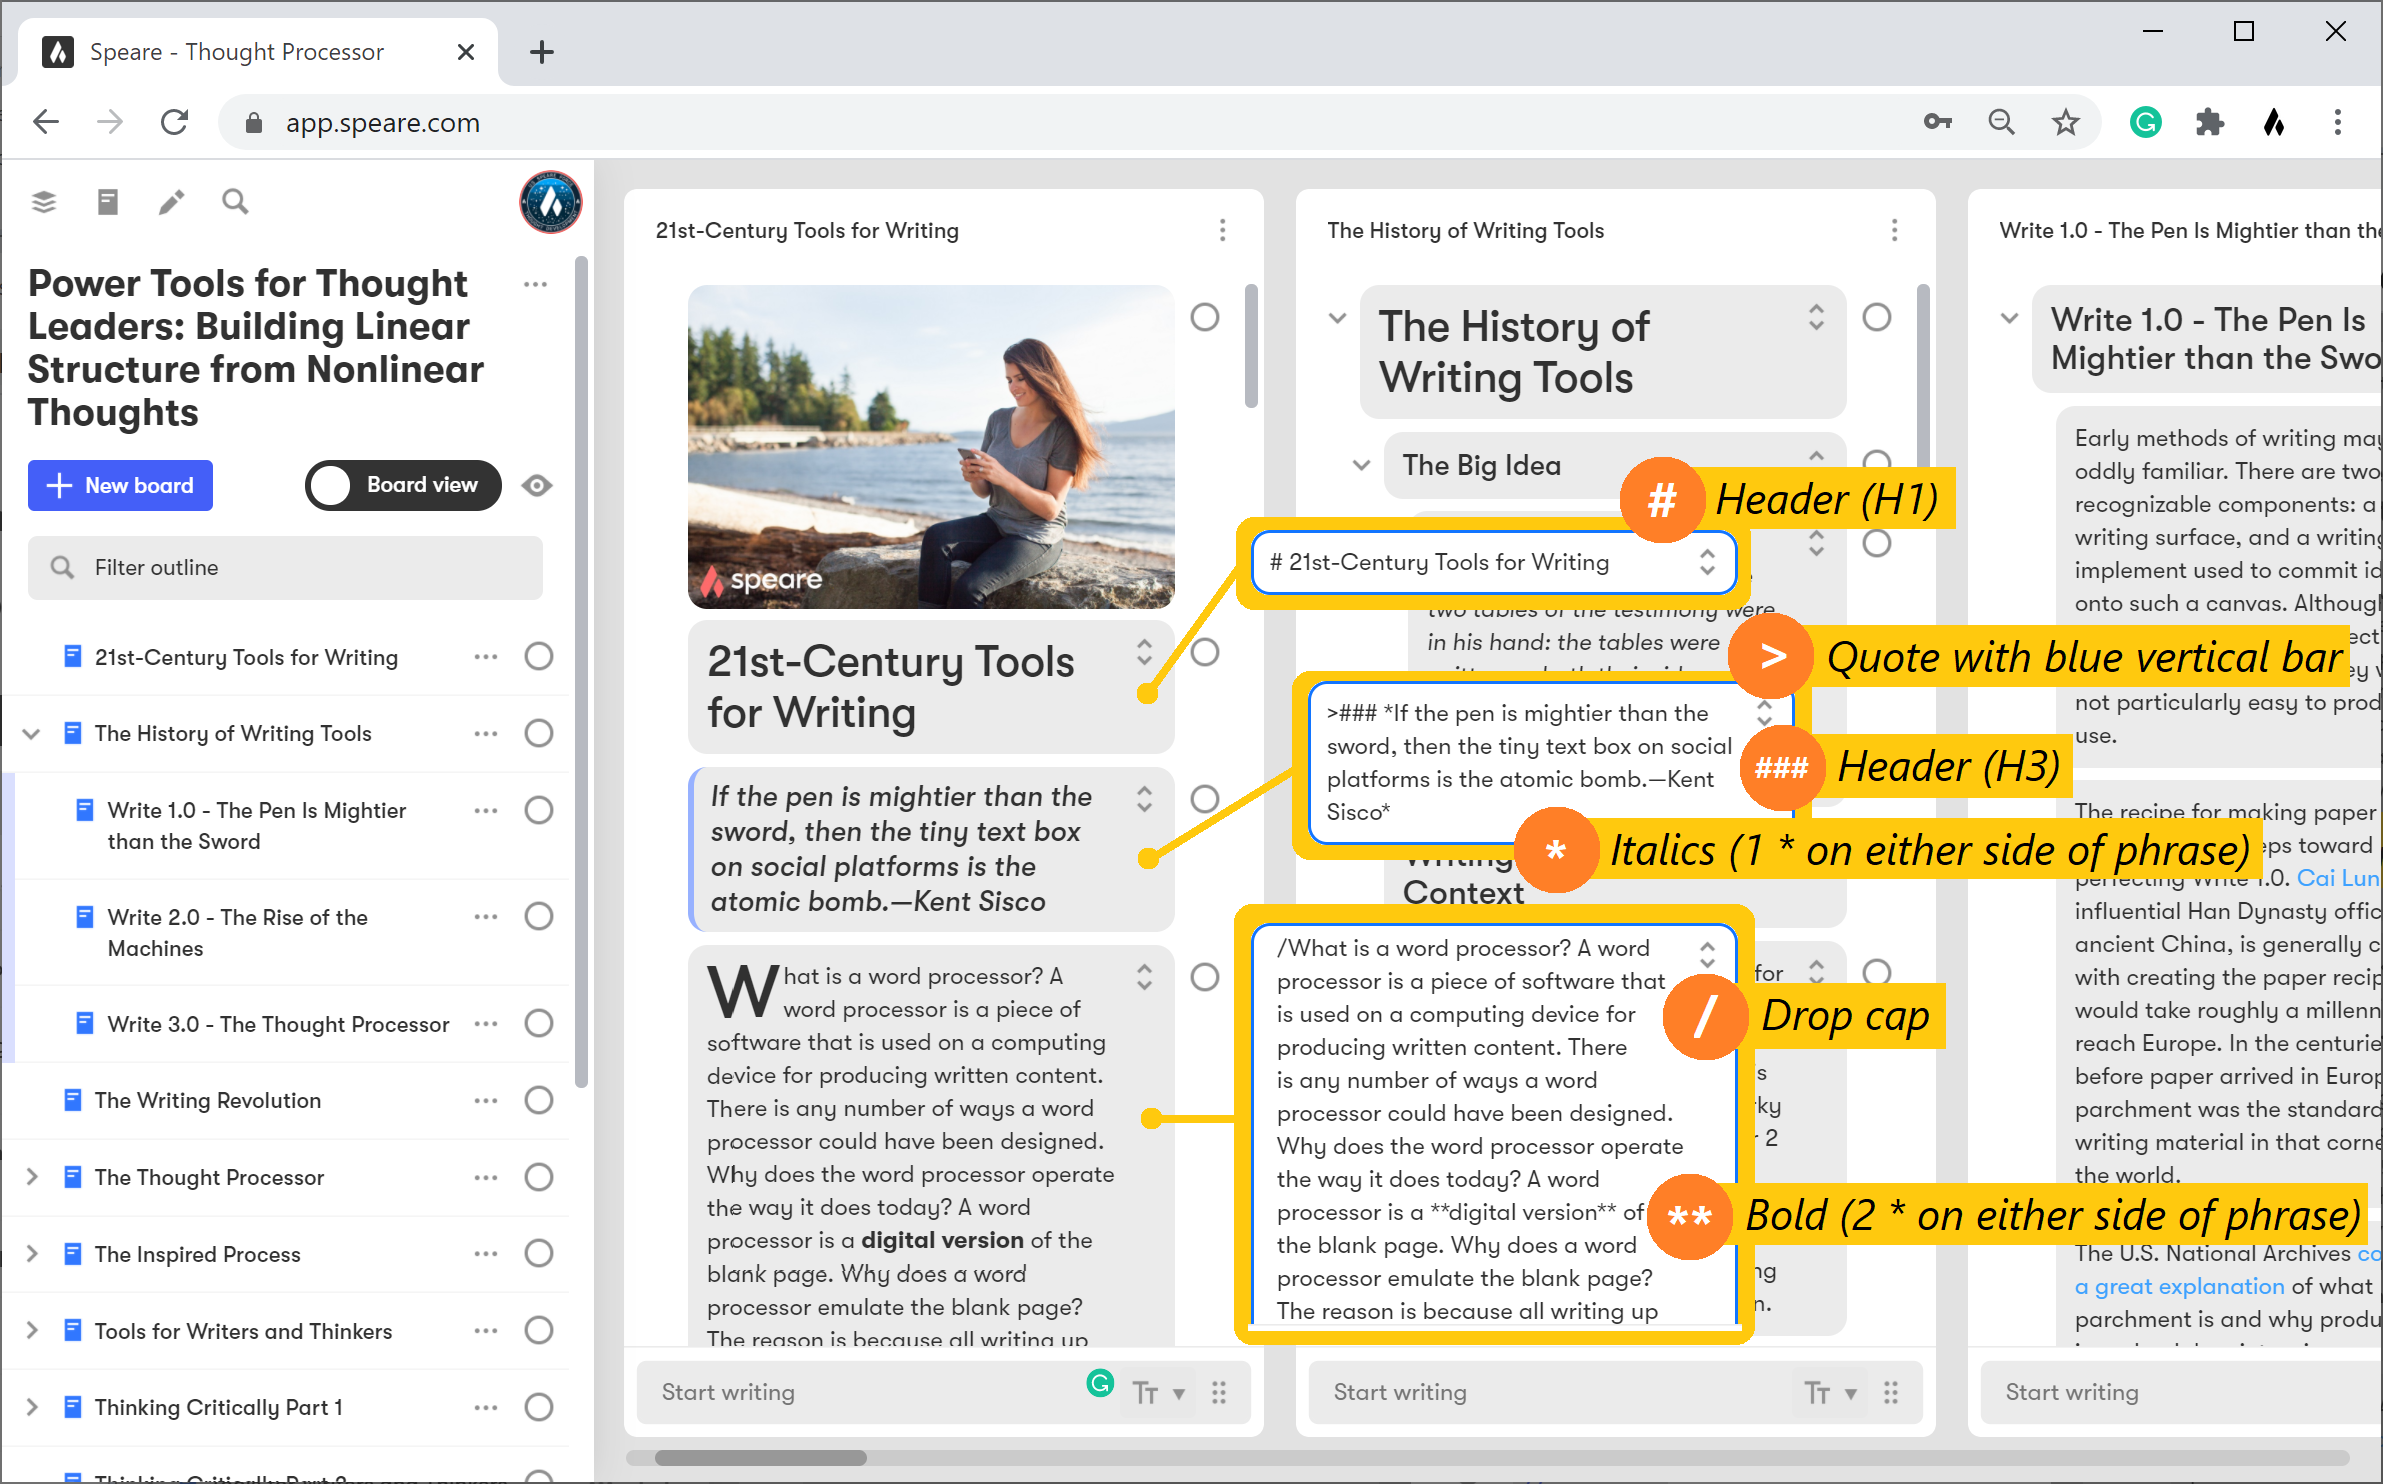
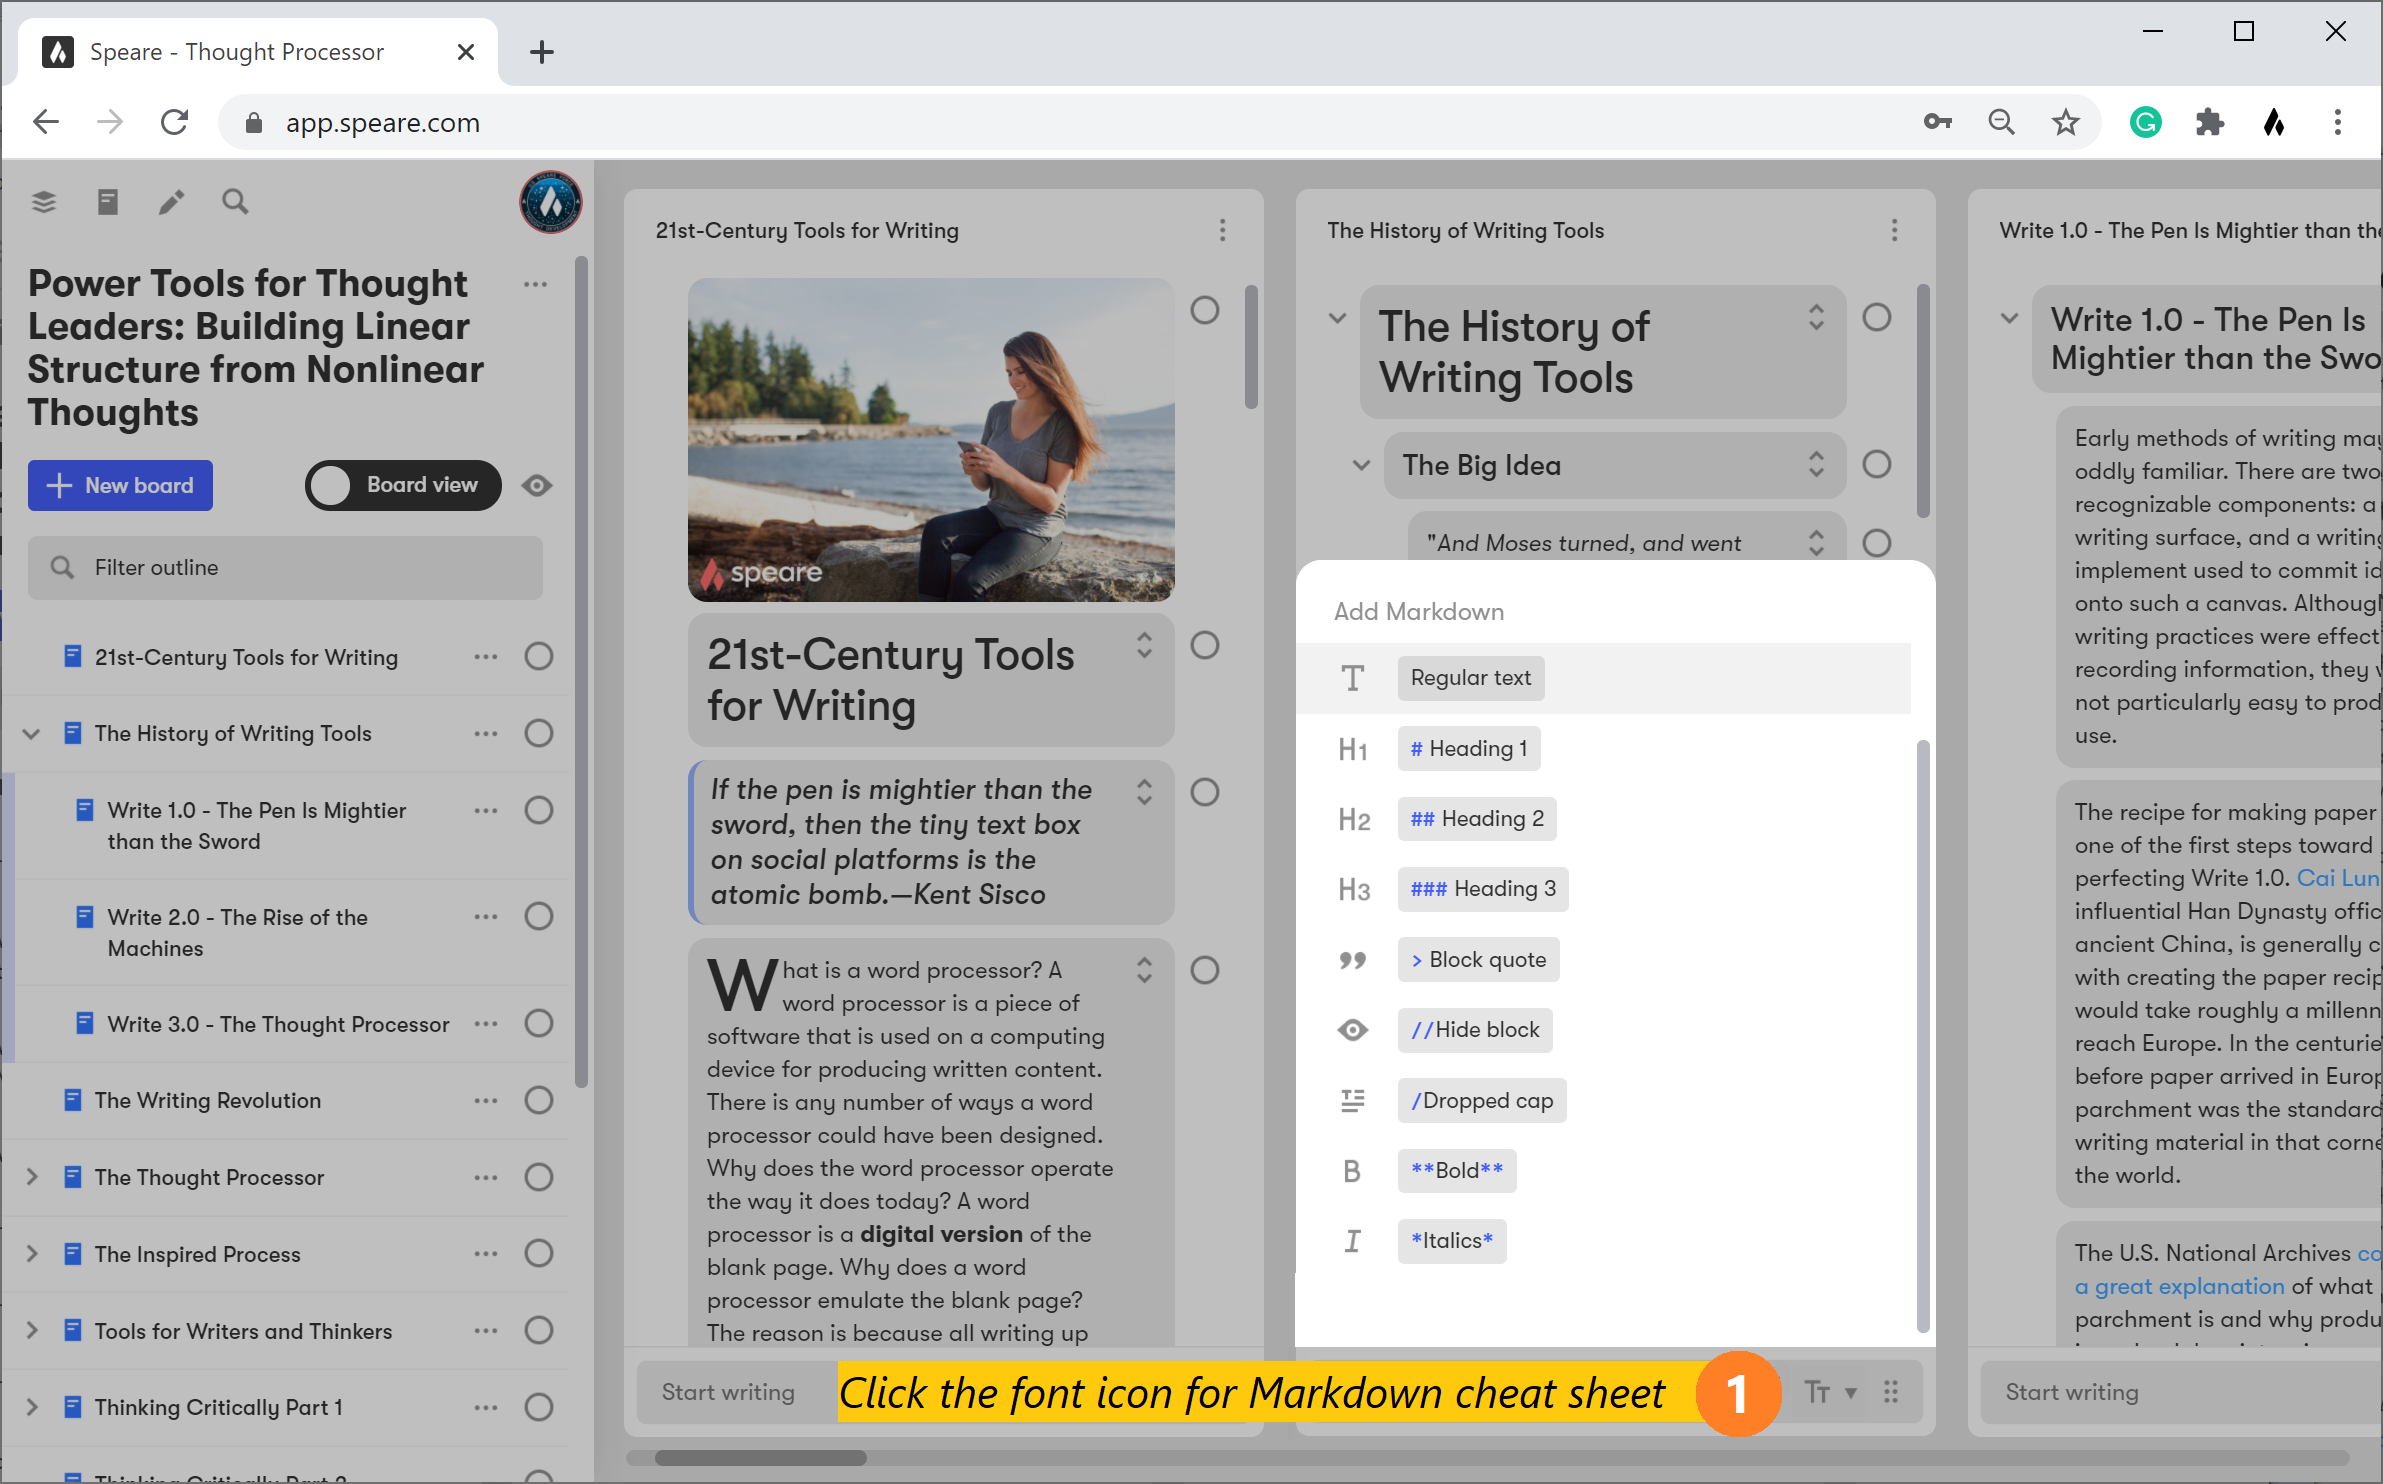
Once you've captured and organized your ideas and summarized them, you can begin to format them with Markdown using the following...
quotes can be designated by using the > symbol at the beginning of a block
Markdown cheat sheet
Creating internal and external links
Creating either an internal or external link uses the same format. An internal link is a link that links to any board that you've created in your thought library. An external link is a URL that links to any online content outside of Speare.
A link in Speare is made up of brackets around the caption or title of the link and parenthesis around either the title of a board or a URL.
Here is the format for an internal link...
[ word or phrase ] ( title of any board )↵↵
Here is the format for an external link...
[ word or phrase ] ( URL )
Note: there can be no spaces between the closed bracket and the open bracket in either the internal or external links above. We left a space between them in this case because they'd turn into a link if we didn't and you wouldn't be able to see the format.
Creating building block lists
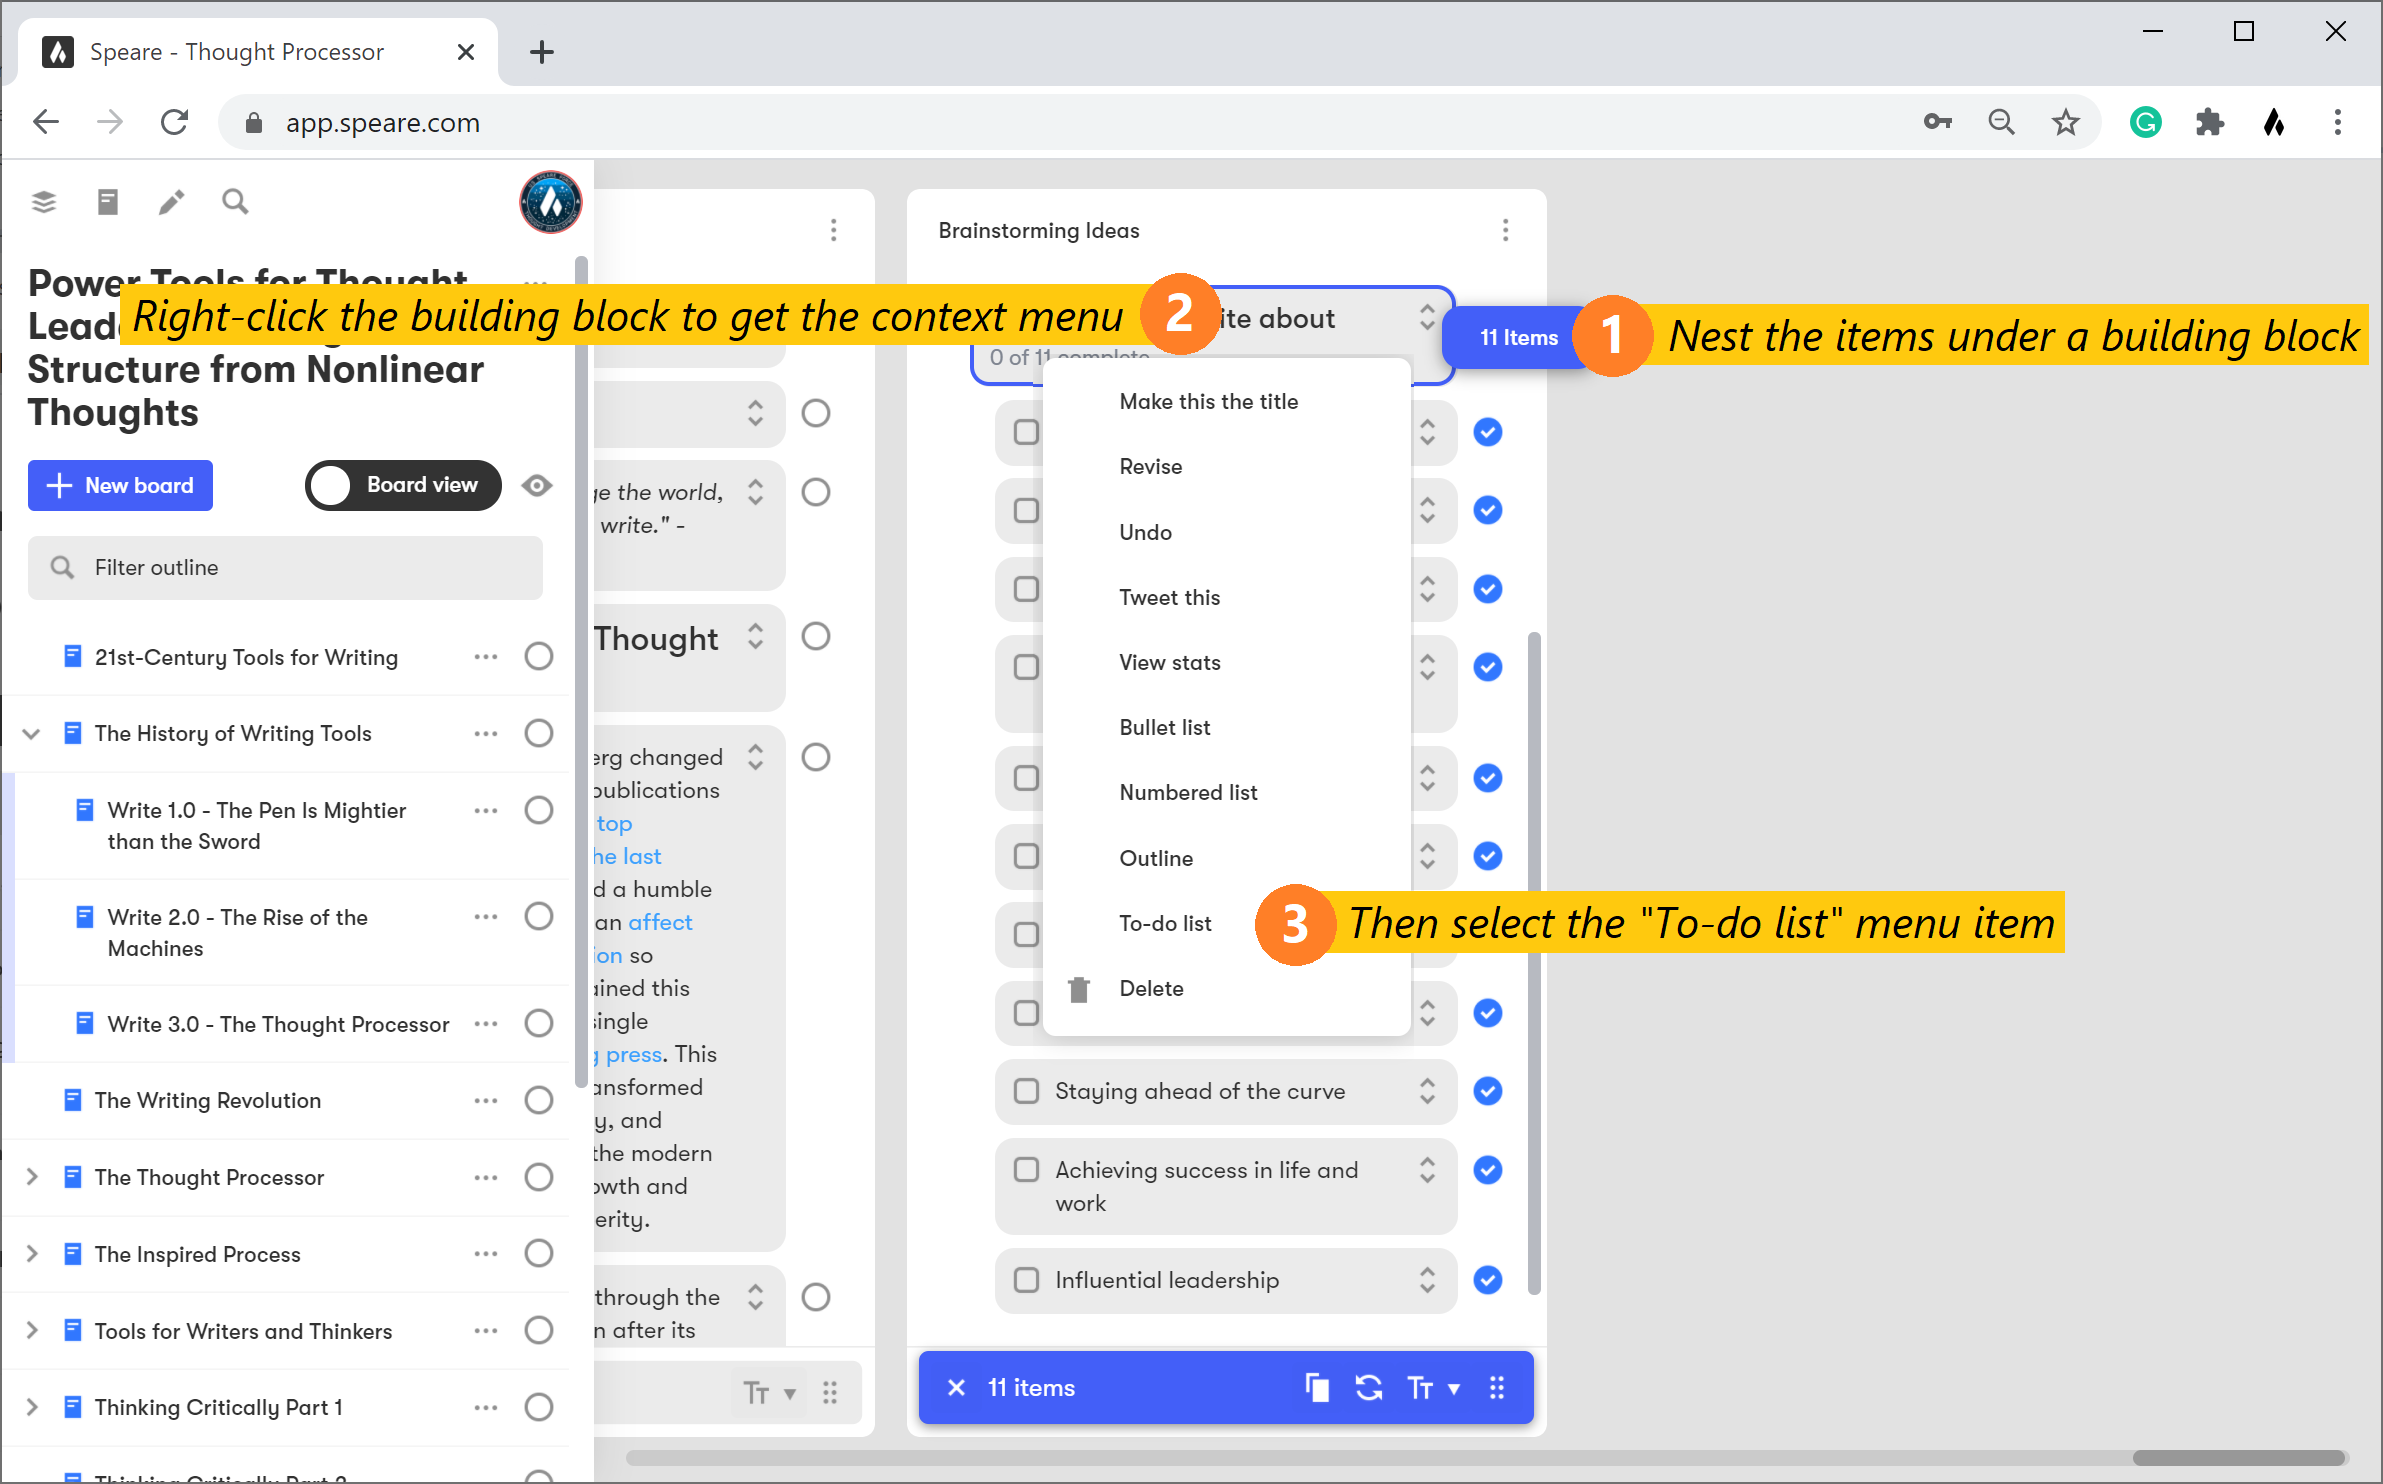
You can create lists by nesting building blocks under another building block. This creates a "parent/child" relationship so that when you set the parent as a type of list, the children inherit that formatting style. Here are the for types of lists you can select from the context menu...
//Working with the Outline
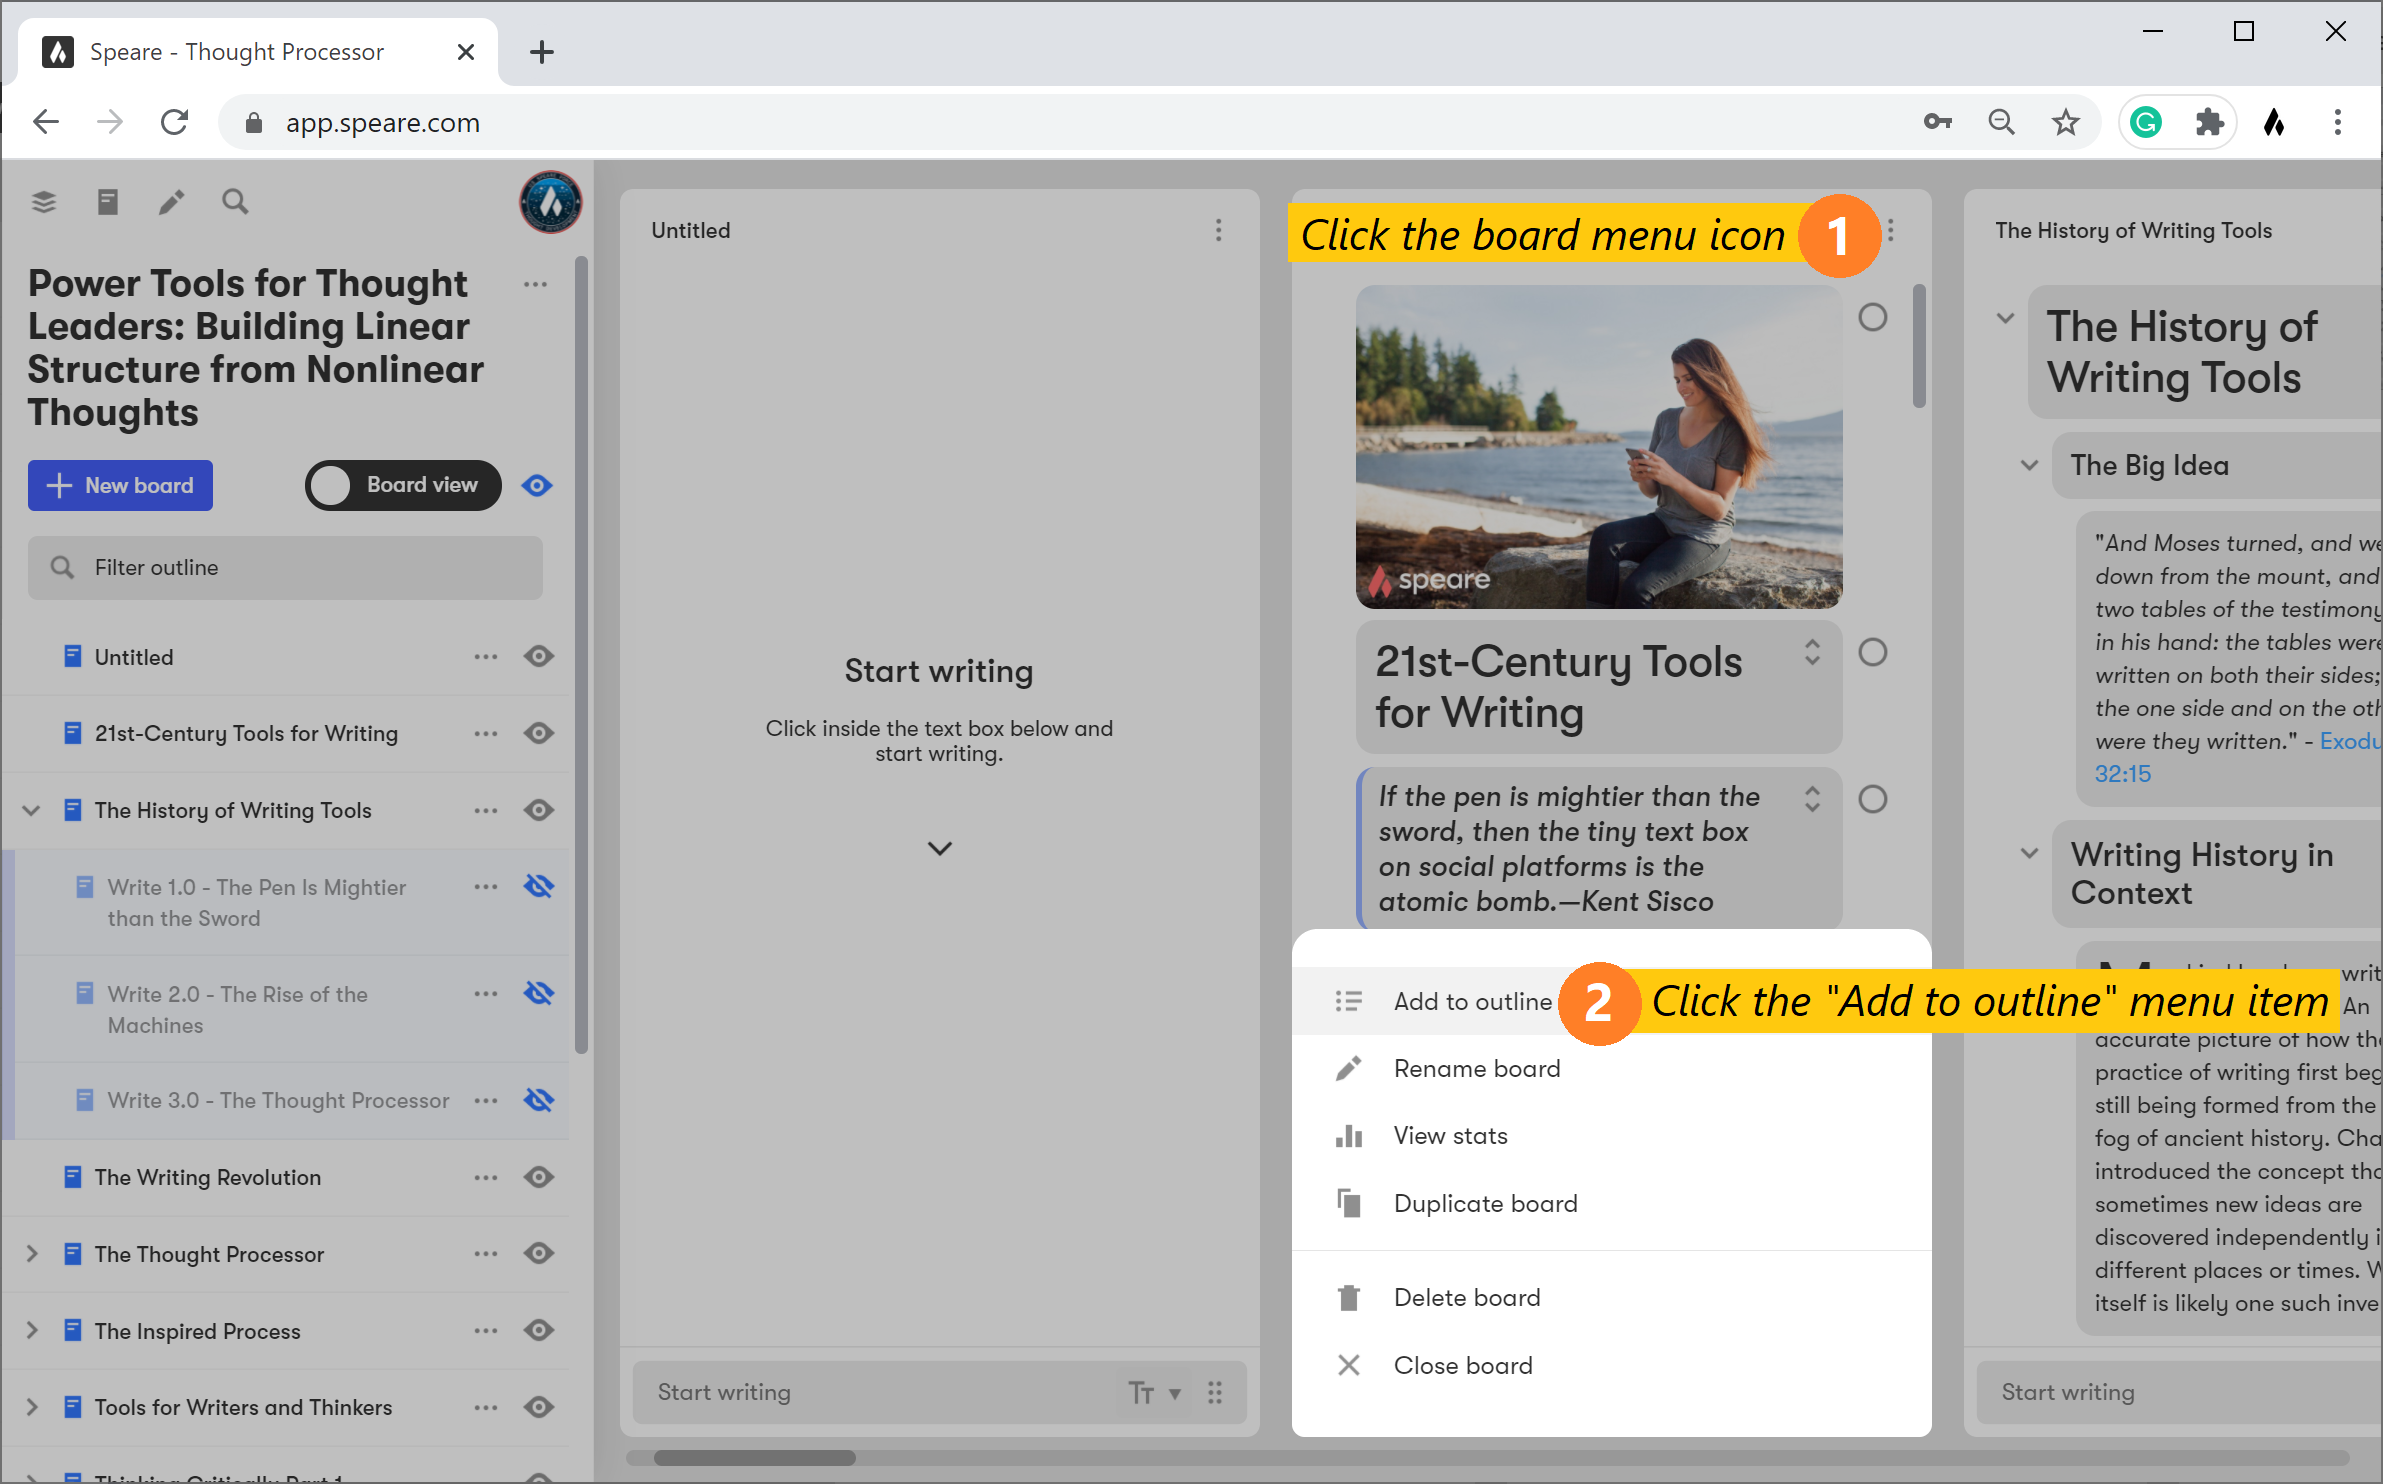
Adding a board to the Outline
Toggling board visibility
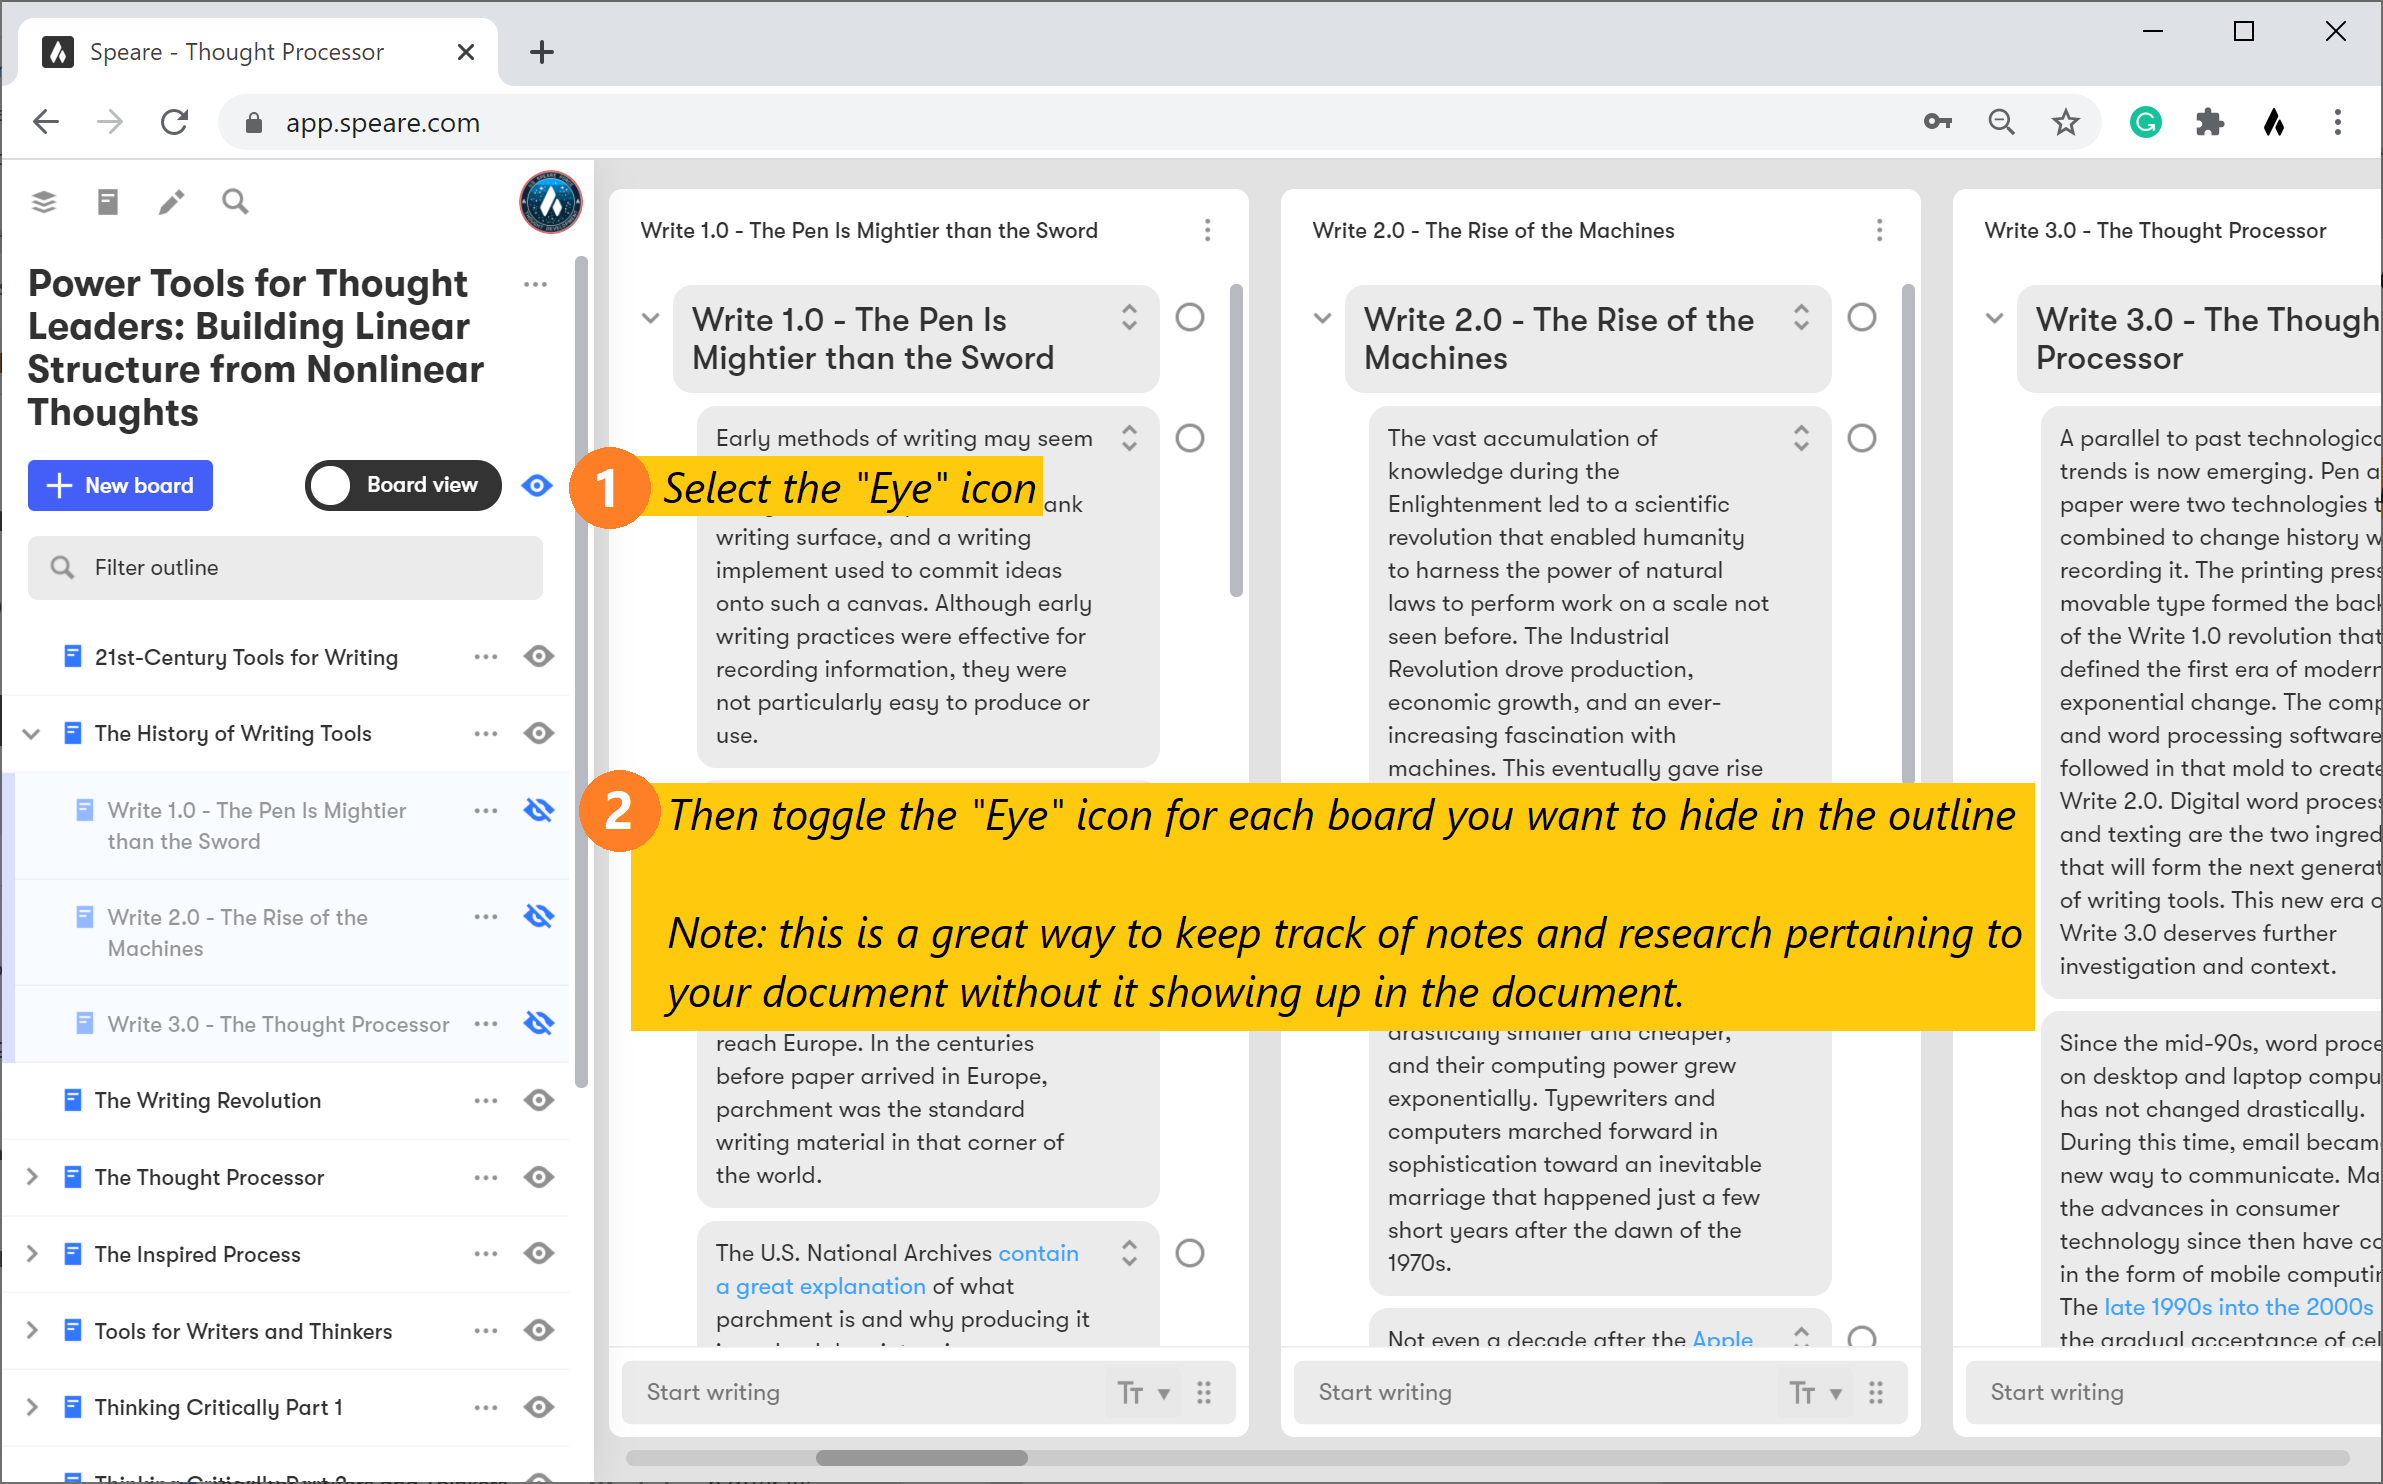
The Outline is a powerful tool for both organizing content from your boards into structure for a document and also for keeping track of content associated with your project or document that you might not wish to be displayed in a document. There are a few great reasons for keeping boards in your outline but also hiding them in Document view...
Working with your Document
As you begin writing down ideas, you sense there are a number of different ways you could develop out the idea. You start to do some deep thinking and more writing. This is when you begin to become aware of the struggle of creation. That's a good thing. It's real work, and it's meaningful work. It's fun to explore and uncover new ideas. This struggle can also be very exhilarating.
Creating a Navigable Document
Writing a Book